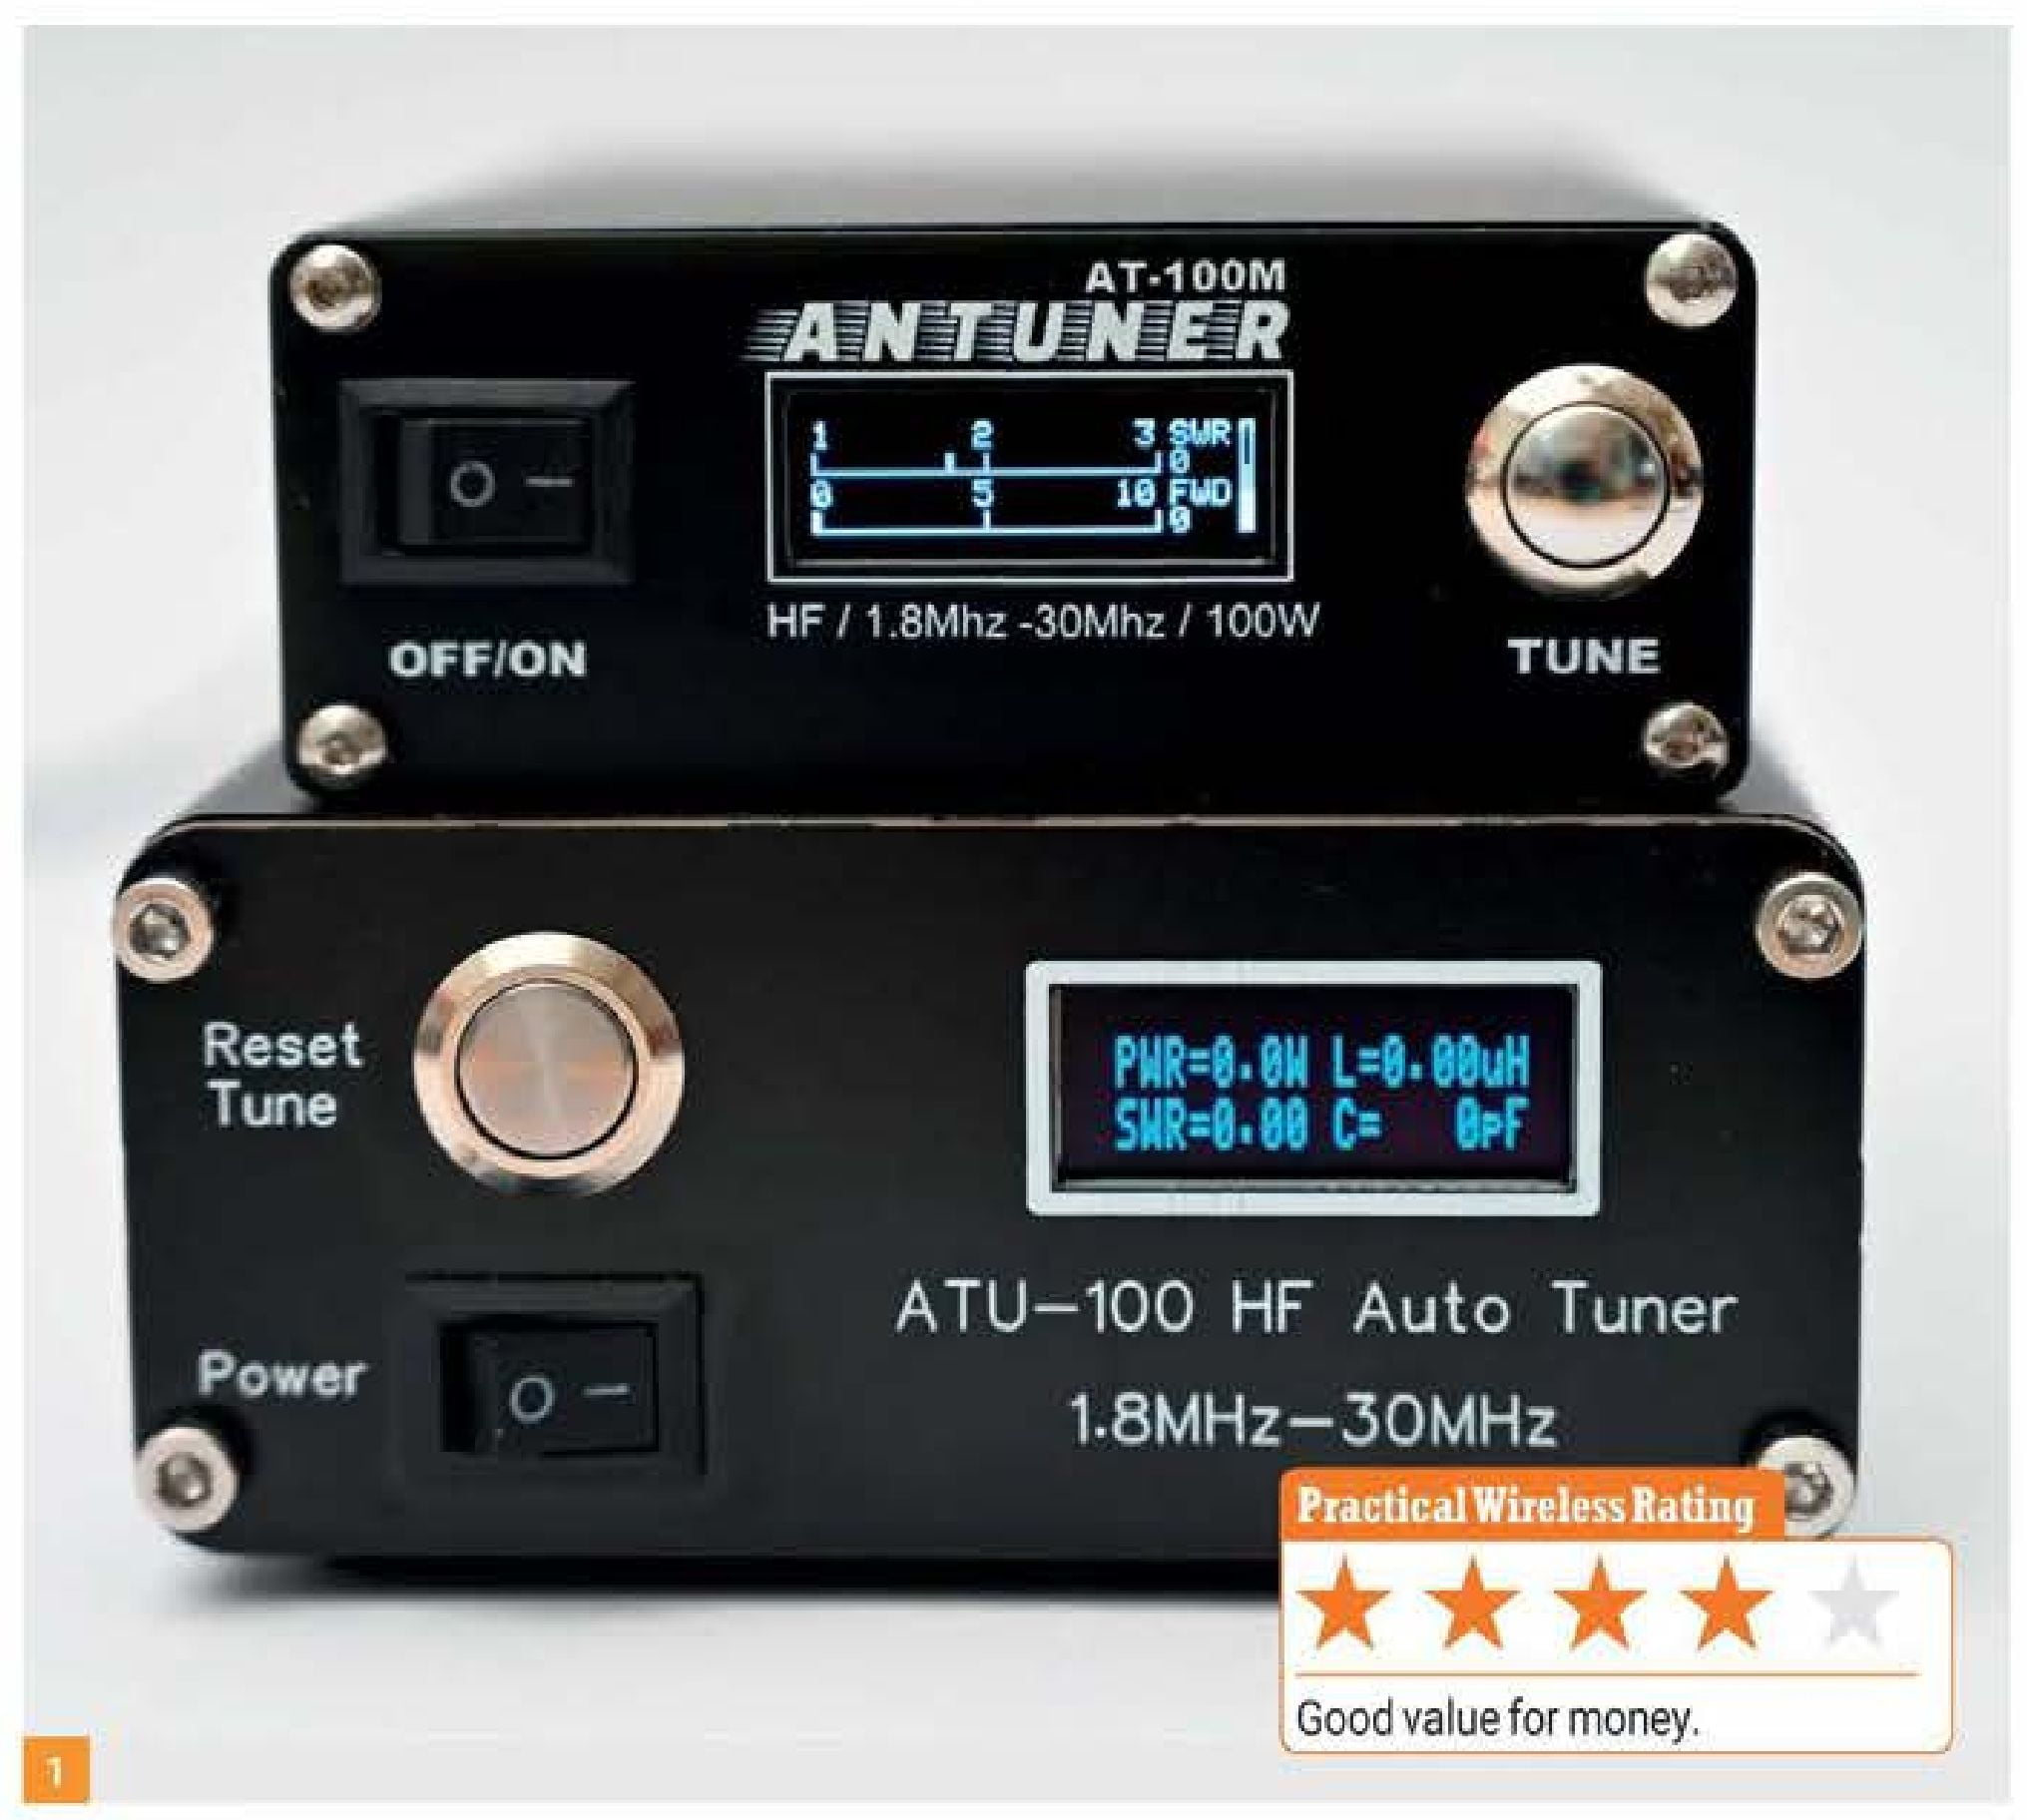
ATU-100 and AT-100M Review: ATU-100 auto tuner on a budget
Richard Constantine G3UGF looks at the ATU-100 plus the latest version, the AT-100M.
A friend called me to say that the auto tuner at his /A alternative location had finally passed away and was looking for a low-cost replacement. Did I know anything about the Chinese-made AT-100? I have to confess that despite being something of a hoarder and possessing several automatic QRP to QRO matching units from various manufacturers, this was a new one for me. Yes, I was aware of it and had seen it many times in many versions online and in various forms, but I never used one.
After a little discussion and seeing what looked like a very attractive price online (caveat emptor), I couldn’t resist joining my friend in pressing the ‘buy it now’ button to find out if it could live up to its claims.
At this point, goods on some online sites described as being ‘in the UK’ or ‘delivered from London’, etc., don’t often arrive as quickly as you might reasonably expect. In most cases, they are part of larger shipments from China that may already be in the UK, or you may have to wait for the next container load. In my case, it was delivered from a warehouse behind a supermarket in Ipswich three weeks later.
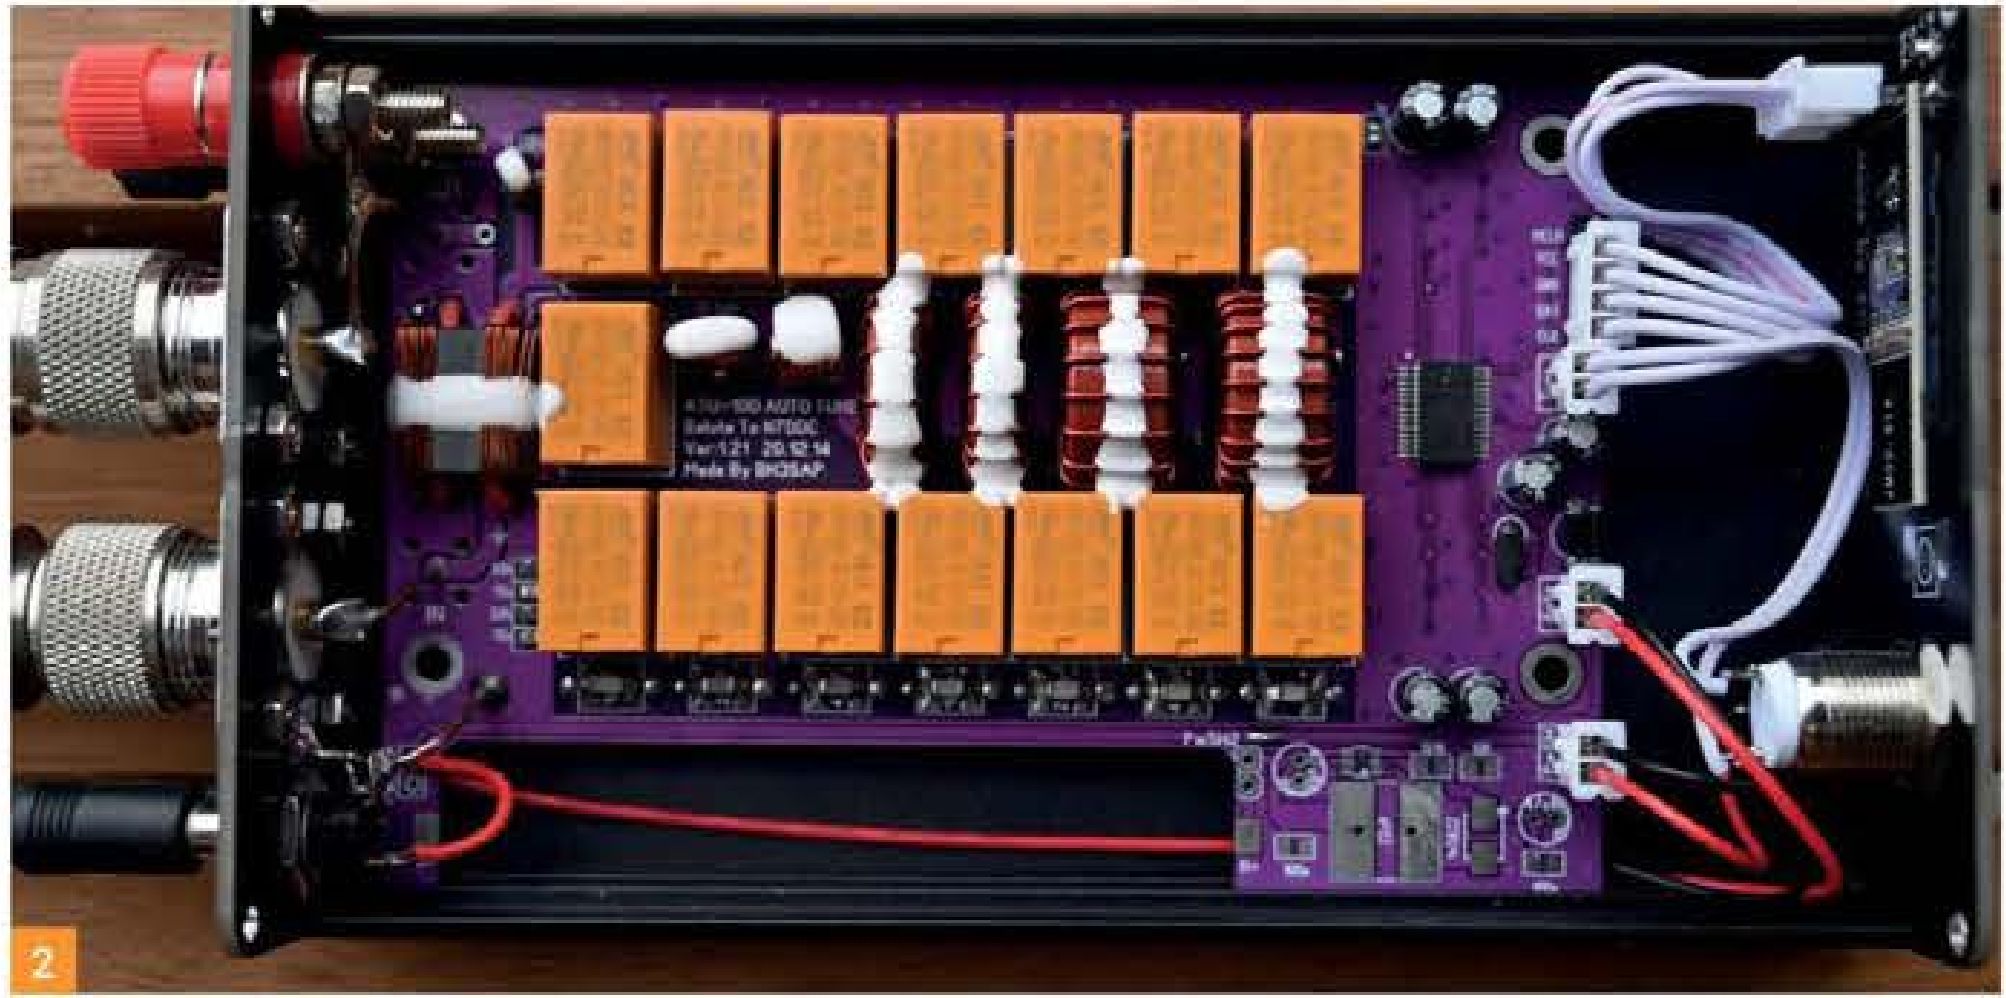
It arrived without instructions, warranty information, or maker’s label, and only a thin, unfused power lead. I removed the lid gingerly for PW readers’ benefit and was pleasantly surprised to find a very professionally built PCB.
Same tuner, many versions
It was immediately clear that this was the ubiquitous open-source N7DDC design in the public domain. It said so on the PCB designed by BH3SAP.
Never slow to seize an opportunity, this design first appeared in China as bare circuit boards some time ago, with components as a DIY kit. This remains true today, and you can obtain one from many different sources, including Amazon.
Early assembled versions had problems. Many were of variable build and component quality, but this can’t be said of the one I received.
With so many now flooding the internet, some assemblers either omit buttons and functions to save cost or add additional bits to make them more attractive. The design calls for a plug-in LCD display, and I’ve seen some quite large ones, the smaller displays being more common.
My version has the addition of two rear-mounted terminal posts, for use with wire antennas and ribbon feeders, not just coax. Higher end units from well-known companies usually sport a 4:1 balun inside where you find post terminals. In this unit the red terminal is simply in parallel with SO239 socket.
Thinking about it a balun capable of handling 100 watts simply wouldn’t fit inside the case but there’s nothing to stop you adding one externally.
Design parameters
Reading the design notes for the ATU-100, I discovered that Dave N7DDC originally designed the unit to have separate bypass/straight-through and reset modes using individual buttons. This particular incarnation arrived with a single large push button that I soon learned has a dual function. During testing I discovered that a short press triggered reset and a longer press put the unit into Tune mode as indicated on the display. Looking online at a DIY kit version instruction sheet clearly showed that wires soldered to the underside edge of the board marked B1 and B2 via a switch to ground can be engineered to trigger the same functions on separate buttons.
Which brings me to the PIC microchip that’s on the PCB located just behind the front panel. If you’re into programming the design notes and the black art of hexadecimal code, the design shows 34 different parameters that can be set. Maybe bedtime reading for some but definitely not me!
The original design requires a minimum input of 5 watts to initiate tuning but for those interested only in QRP operation there’s now a lower power modification doing the rounds on forums.
It’s clear from the shape of the circuit board in the test model and the legends on the PCB that the design has provision for adding an optional battery, presumably Lithium, plus a charging circuit.
Of course, install more components and the price is bound to rise, easy to miss when checking models on eBay and listed at similar prices.
To the hills… or not
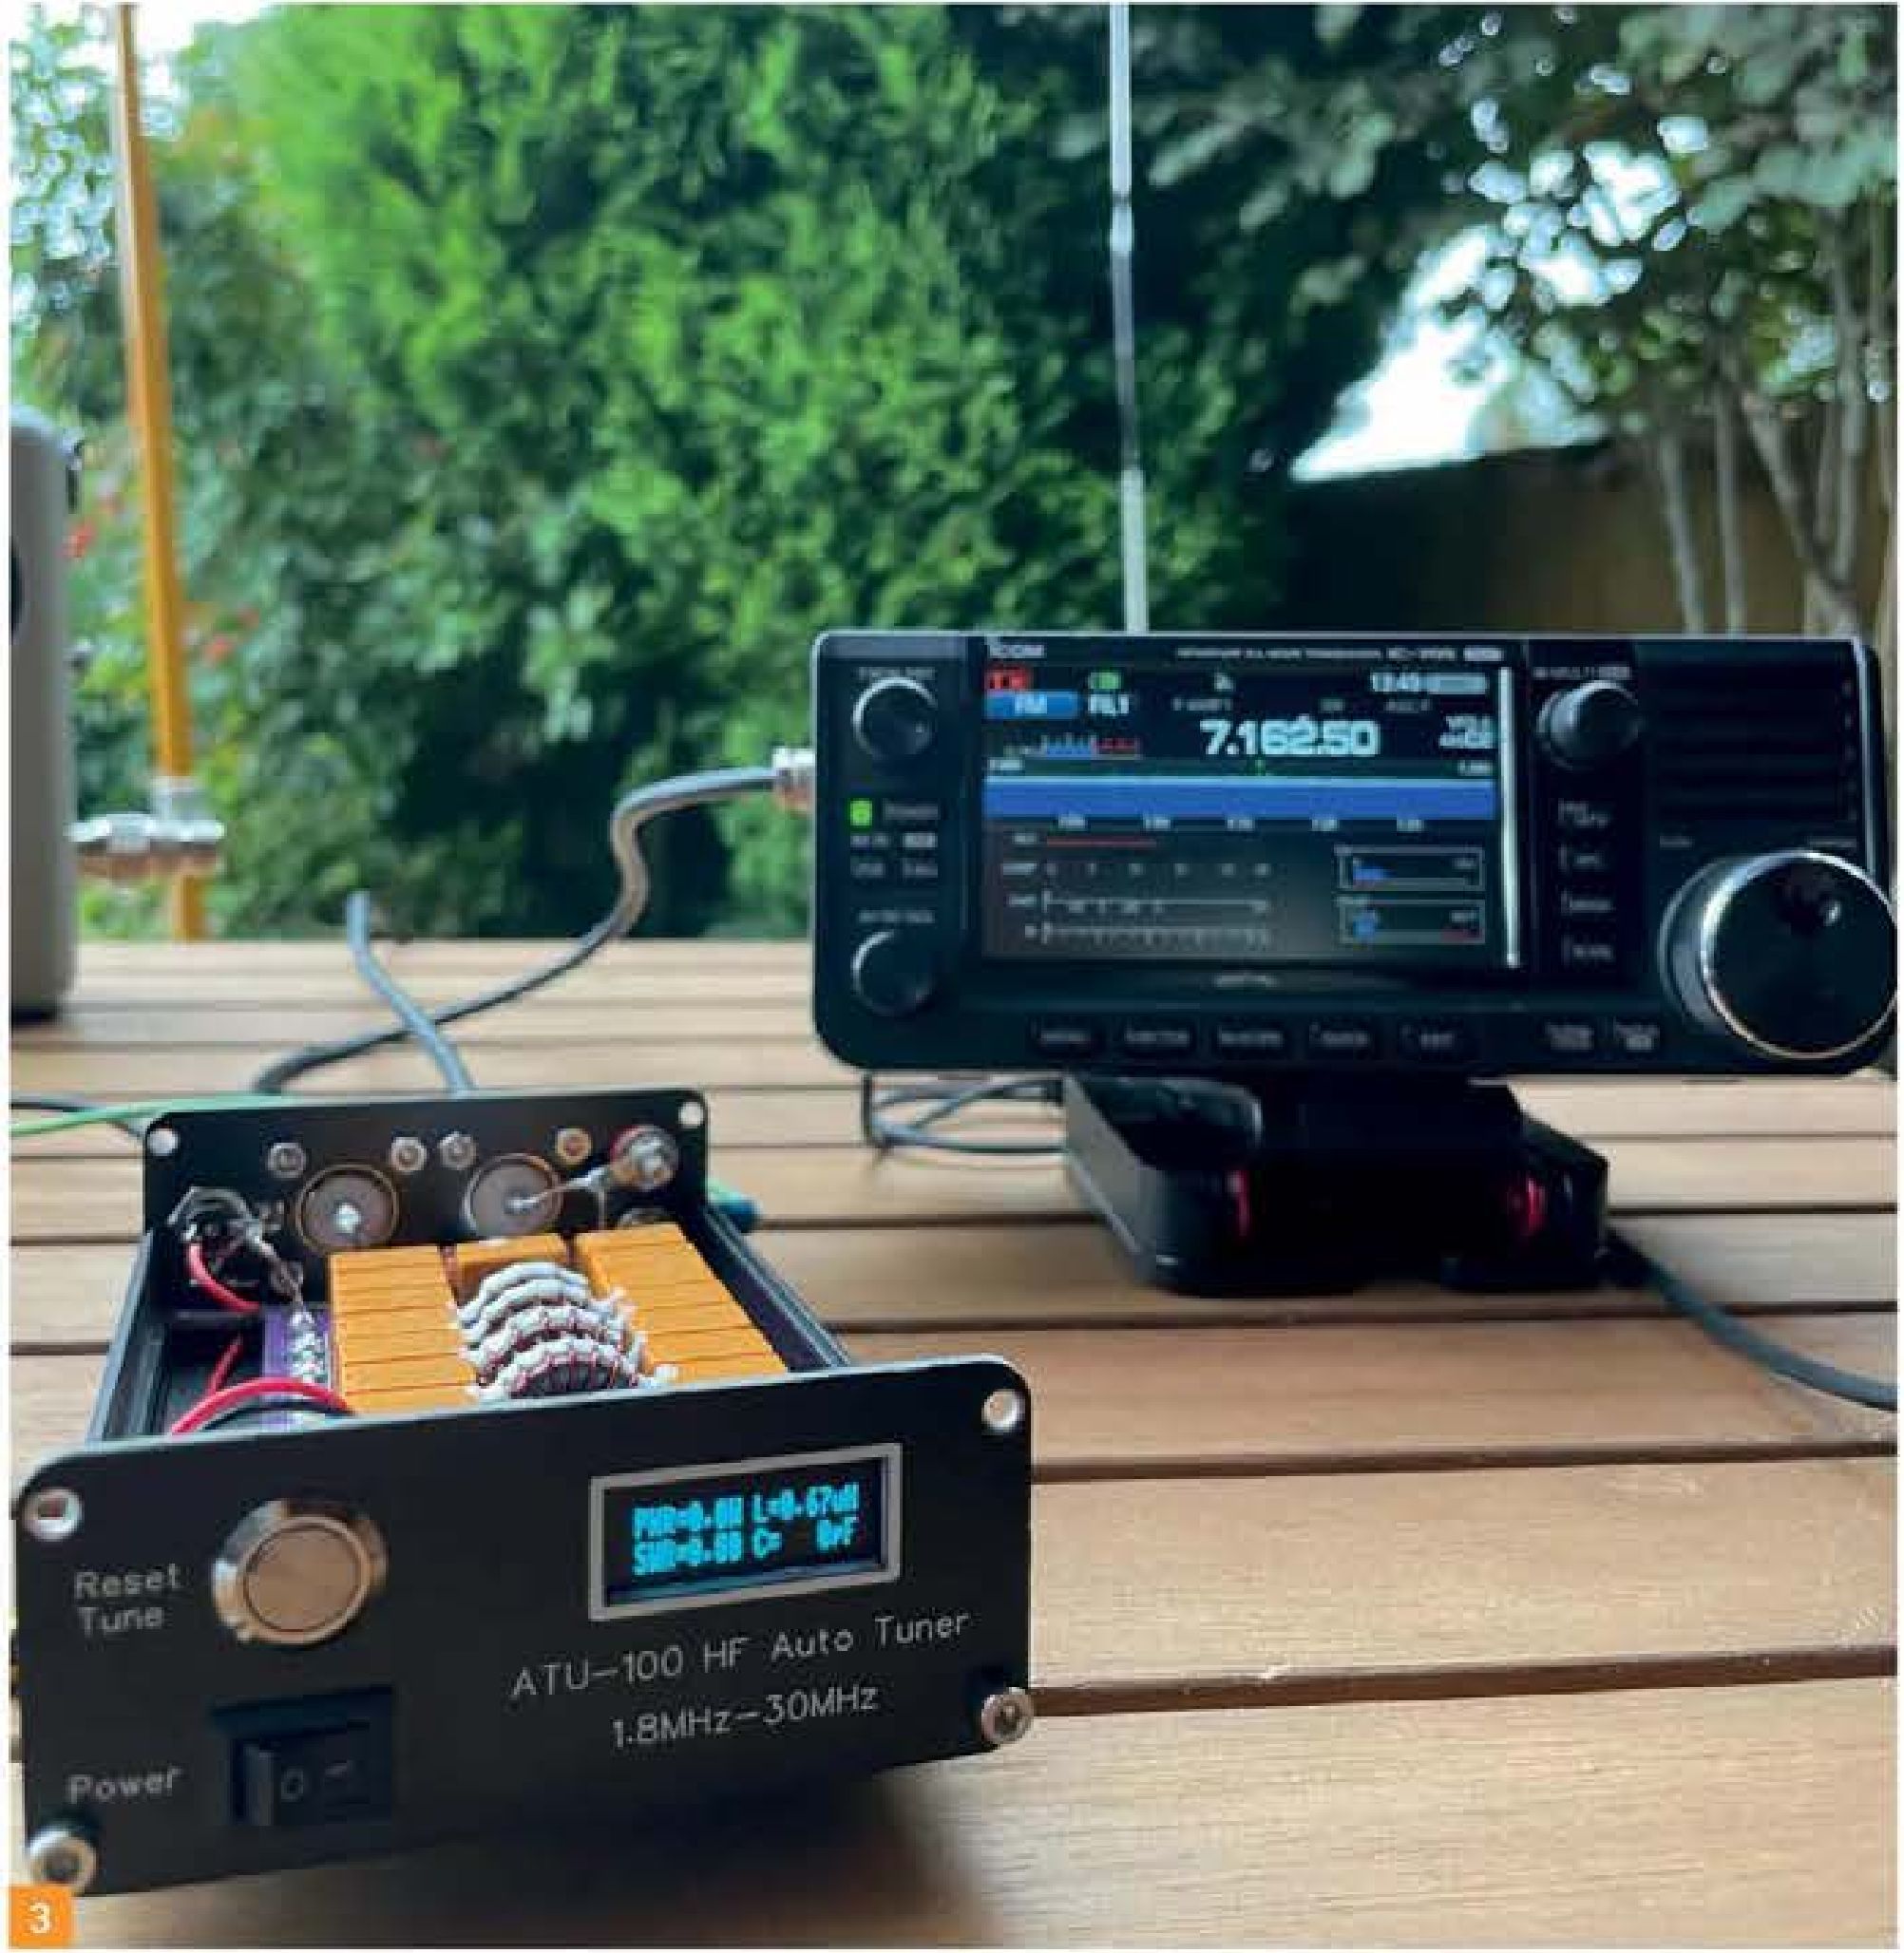
Homework is done and itching to see what the unit might do, I hoped to take it with me on my next trip to the wide open spaces of the wild country. Unseasonal August weather put paid to that, and I had to make do with dodging the rain in and out of my summerhouse. This proved to be something of a bonus as I was able to spend a whole day experimenting with a greater range of antenna combinations and pushing the unit out of its 50 ohm coaxial comfort zone.
Guessing that the ATU-100’s main use is likely for portable operation rather than the shack, I tested it with a variety of end-fed wire lengths, plus ground earth. I was looking to find a match where the wire was either a random short length or a near half-wave voltage point on the band of choice. Of course, always remembering that the wire suddenly doesn’t become resonant, the ATU hopefully just prevents the radio’s final stage from self-destruction.
The display indicates not only power transfer and percentage loss but also the value of L and C in circuit at any one time, once tuning stops. This indicator helps to understand what’s going on when making antenna adjustments. The readout tells you what value of L or C is being inserted into the network. From this you can work out whether the antenna is behaving either inductively or capacitively, either side of minimum VSWR and without the need for a network analyser. I like that bit.
Finding the limit
That said, the power meter display needed to be taken with more than a pinch of salt. I was to some extent ‘pushing the envelope’. In quite a few cases it indicated input power greater than actual fact with corresponding loss of output power. There was never any RF instability as some have claimed and I’m only talking about 0.3 -0.5 watts discrepancy. The device does read correctly into 500 and has a higher matching limit of around 800 ohm. Of greater interest proved to be the automatic readout of what the display said was ‘efficiency’.
As anticipated and just because I could, the worst-case scenario was a short 7.6m vertical wire, which gave a misleading match outside its design impedance with a rating of just 26% on 80m. Lost in translation and while the receiver was hearing things, where was 76 watts apparently disappearing when running 100 watts? The obvious answer being heat but at least it was letting me know just before the inevitable disaster. Don’t try this at home!
Wires and whips
So much for non-resonant antennas, what about near resonant devices? Over many years I’ve collected (hoarded) something of an arsenal of antennas of all descriptions.
Checking with inverted V’s and a trap vertical proved no problem. Wandering away from the in-band resonant frequency you could easily see the power transfer drop at the edges and with it the so called ‘efficiency’. I was really interested to indulge myself with some HF mobile whips, typical of an average temporary setup. It’s where I see this type of ATU being used, particularly as the base feed impedance of a vertical is much less than 50 ohm at around 10-20 ohm typical.
With a ground mount decent earth and half a wet day to play, I checked from 80-6 metres with a range of antennas including: Ampro helical, baseloaded Atom whips, Hustler base loading and also centre-loaded QRO types, late production G-Whips plus genuine ancient G-Whips made by company founder and friend, the late Frank Pardy GW3DZJ, both the top-loading four-bander de-luxe and centre loading helical types.
As expected, centre loading and helical versions showed much greater efficiency/effectiveness of power transfer at around 91-93% while also providing the highest remote field strength readings. Base loading, though practical, scored significantly less. No surprise and nothing new.
Hustler centre-loaded was a close second but the overall winner was a 50-year-old, 6ft White G-Whip linear loading and helical wound tribander, showing a 95% transfer. If you ever find one, buy it! Secret…linear loading allows the full length of the element to radiate.
5 watts of CW got contest replies from both KO and K3 on 20m. I presume they had ‘big’ antennas.
The specification states the ATU-100 requires around 400mA maximum over a voltage range of 10-15 volts DC with a small residual drain in stand-by mode. Band hopping much more than a typical user might do and testing all day long proved no problem for a small external battery pack. Without modification the ATU-100 requires a drive level of 5 watts RF and can reasonably handle up to 100 watts.
The power measurement readout was mostly 10% out from specification and my findings agree, as listed earlier. There’s a total inductance available of 8.53 μH and capacitance of 1869pF as listed in the design notes.
Complex or basic?
The experience of using the ATU-100 made me somewhat philosophical… How can something be both complex and yet basic? Take cars for typical example, basic models and high spec ones are all cars and they all get you from A to B.
The ATU-100 is both a complex, yet basic matching device. Typical cost of a DIY kit is around £ and available ready-built, with some difference. It’s all about looking closely at what you’re buying and from where. If you’re on a tight budget, there seems to be little to choose between any of them. Do note that kit versions require some basic surface mount skills.
The ATU-100 did the job reasonably and the value was fine for what I paid. It has latching relays to remember the last band/antenna setting when switched off. The display was easy enough to read if a little small and provided an interesting and sometimes thought-provoking guide to performance.
It’s a general-purpose device, requiring no data cable interconnect and works with any 5 watt plus radio, such as the Yaesu FT-817, Elecraft KX3, Xiegu models etc, but is a little slower to tune as a result.
I didn’t find any band memories so it’s a case of re-tuning every time a band was changed. Unlike some higher spec devices from the major brands, it didn’t automatically re-tune itself and had to be initiated from reset for best effect when moving around in-band. The single flush-mounted control for reset and tune proved fiddly to push until you got the hang of it. The three-button sequence versions might possibly be more annoying.
and now… AT-100M
As if to prove an earlier point, just as this review was wrapping up yet another incarnation of the N7DDC design landed on my desk. This one arrived from a UK supplier nicely boxed and with some translated instructions.
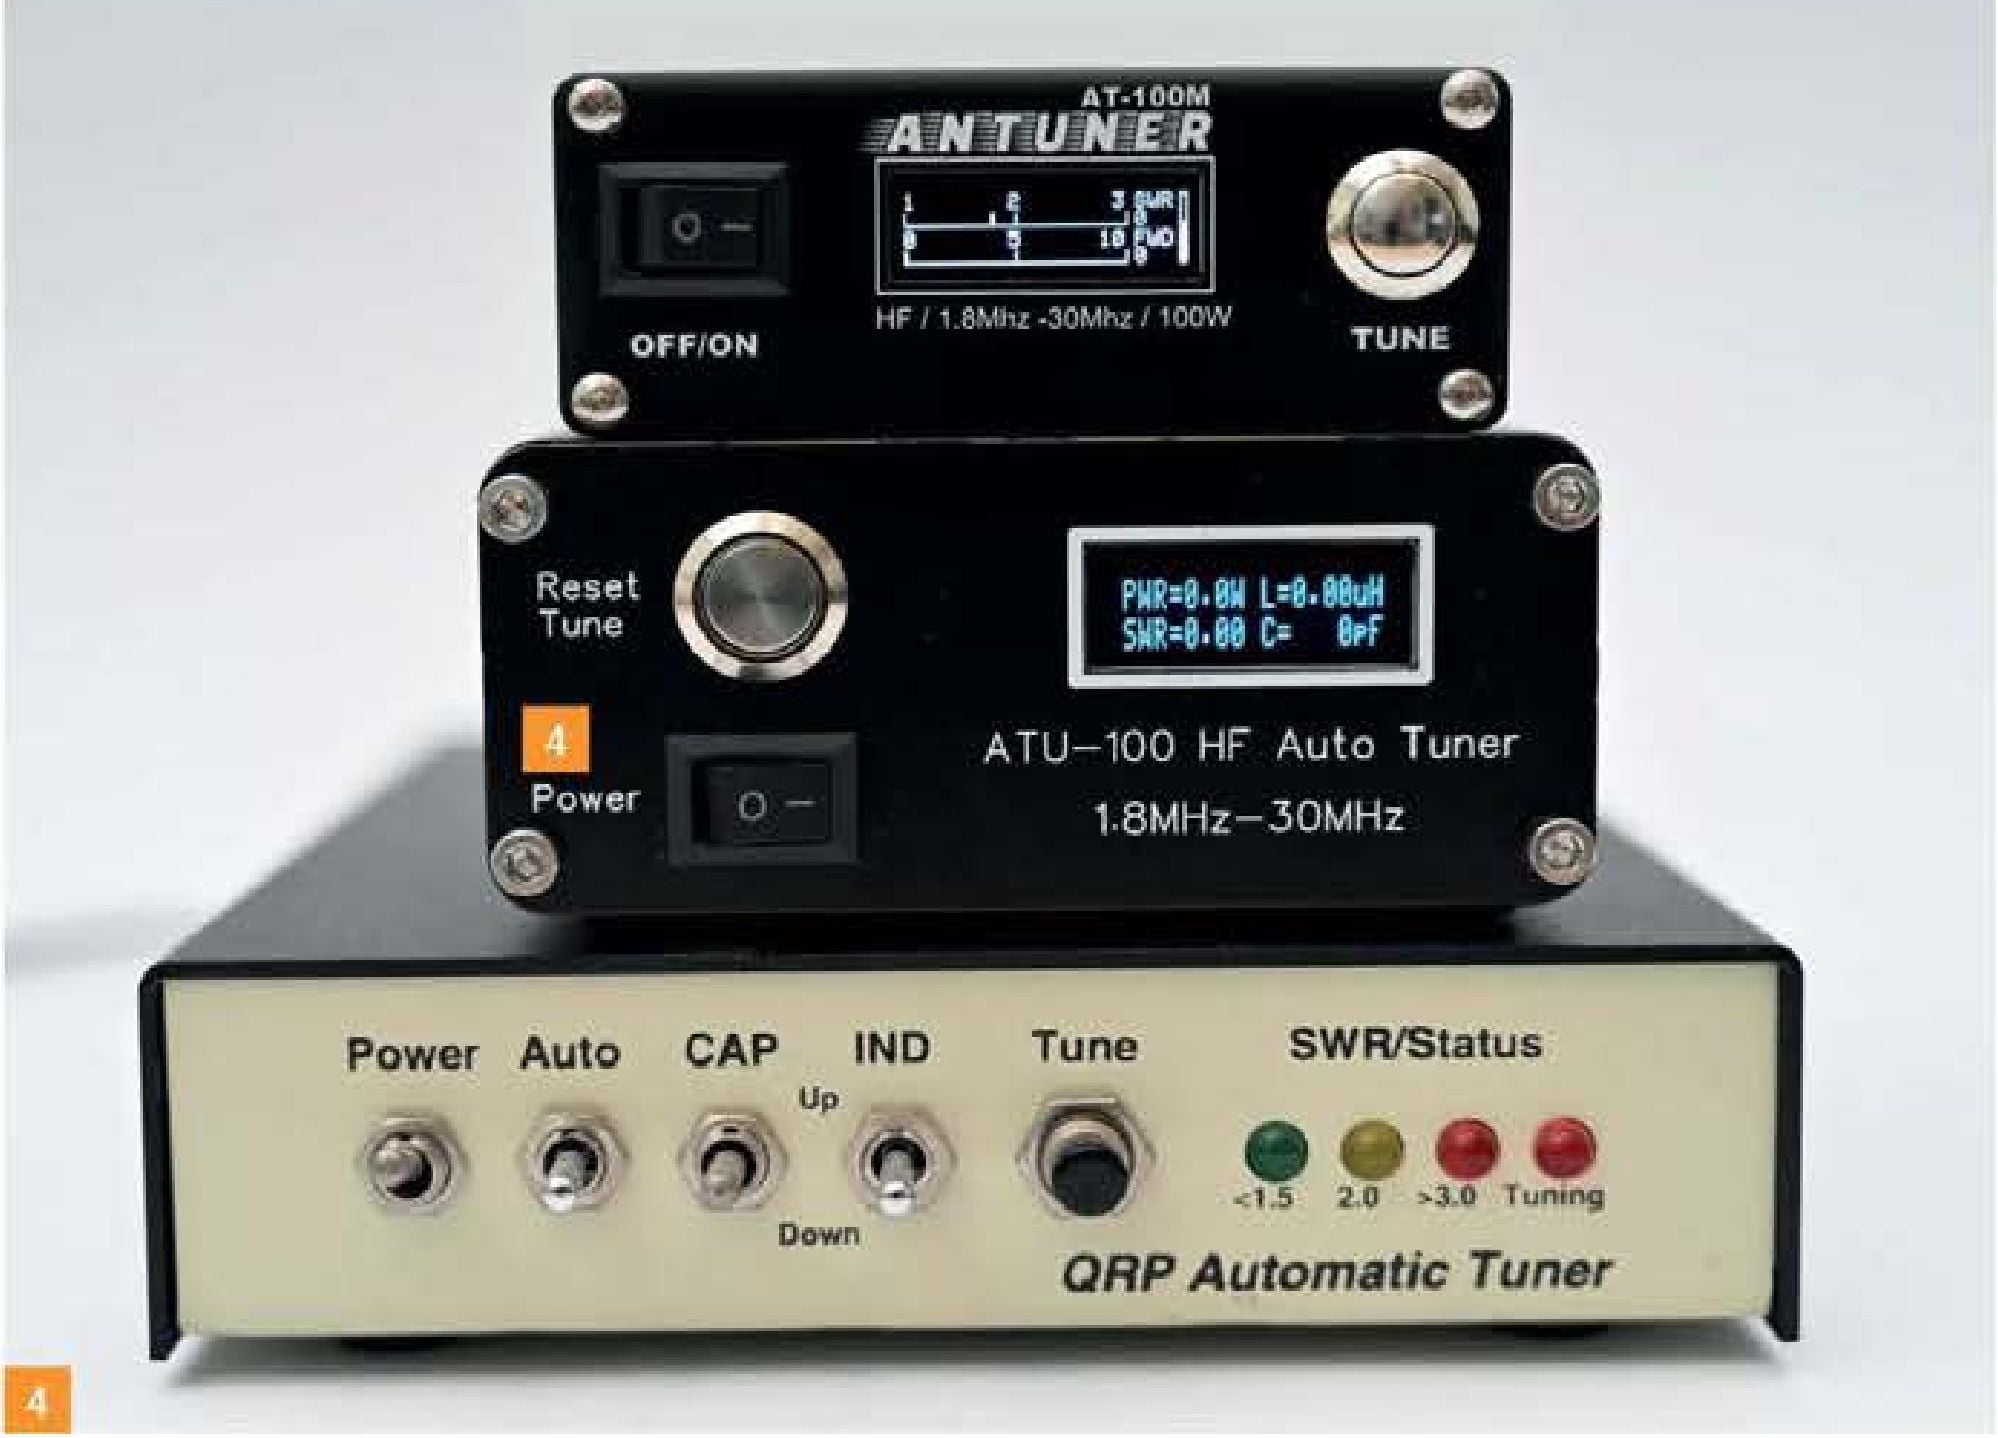
The AT-100M version is lighter by some 80 grams even with its internal battery pack, due mainly by the size reduction. Weighing in at 350 grams a USB charging- lead is included. It has no post terminals to the rear or feet to the base.
I had intended to show you a side-by-side internal view of both units. Ironically, despite the provision of a 1.5mm Allen key in the package (why?), the latest M version is inside an annoying slide-out-only alloy sleeve.
Removing and re-fitting the front panel and disconnecting all the leads proved more than a little tricky so discretion being the better part of valour I declined.
I can tell you that the relays are the same and the inductor toroids are smaller. The spec sheet indicates that while the unit is good from 0.1 to 100 watts, full carrier on AM/FM and data modes is limited to 50 watts and between 18-30MHZ the matching impedance is rated as being between 15-800 ohm.
Same but different
The circuit board layout is very similar, more densely populated to accommodate extra features and this time designed by BI3QWQ.
The central display is completely different. At switch-on it shows battery volts and percentage charge. Forward and Reflected power display shows as bargraphs on two lines. Pressing the much easier raised button on the front panel reveals two additional display screens. Number two gives Forward and Reflected power plus SWR numerically. Screen three gives the number of inductors and/or capacitors in use as blocks, not as L and C values. On a second line in smaller print you can also see SWR, supply volts and percentage battery capacity.
Unlike the previous lower cost version, the percentage efficiency that I found so useful in determining if I was radiating effectively or simply losing power and warming up the tuner unit isn’t available.
Holding in the single button at switch-on gives access to programmable functions/parameters from the front panel. It’s a bit fiddly and you have to scroll through four small pages to find the one you want by repeated button pressing. If you miss it, you have to go around the loop again. – you simply can’t have everything!
To change any one of 17 parameters, you hold the button down to reveal a list of choices, as detailed on the included instruction sheet. Here’s a small sample of things available in the M version.
- Beeper on/off. (ATU-100 didn’t have one)
- Number of tuned results stored -1 -20 available.
- Tune minimum input step power e.g. for QRP etc.
- Automatically tune if VSWR too high Yes/No
You can see that this model now has features not in the original design and appears to have a memory.
Having spent time with both units and repeating some of the earlier test setups, they both have their qualities and work in almost identical ways when it comes to matching a variety of antennas both near resonant and non-resonant. I really couldn’t put a piece of paper between them.
However, on the usability front it’s clear that these two incarnations differ. While the basic concept remains much the same the packaging of the N7DDC design seems to be constantly re-inventing itself.
Price aside, when choosing anything it’s always trade-off between features and benefits, i.e. I want this benefit but do I really need this feature? The big benefit might be the lower price but then again, owning the latest model is always tempting.
When you purchase through links on our site, I may earn an affiliate commission. Here’s how it works.