YAESU FTM-500D Review
Richard Constantine G3UGF takes a closer look and a deeper dive into Yaesu’s new flagship, described as “A high-end communication package”.
Richard Constantine G3UGF
Yaesu’s much anticipated dual-band System Fusion, C4FM and FM transceiver arrived with me recently. As someone who still owns earlier models, I’ve been eager to find out just what more enhancements and benefits can be packed into a mobile radio …apart from SSB and CW, that is.
If you’ve read previous reviews, you’ll be aware that Yaesu has been developing not only the technical capabilities of their radios but also in a big way the customer/user interface.
The early FTM-100D was conventional in appearance with C4FM capability. Radically different, the two-part FTM- 400D was designed for remote mounting only, either in a vehicle or on a desk with limited space. The large touchscreen being easy to see and use.
On the downside, despite twin receivers C4FM was only available on the upper display of the FTM-400D and I like to keep VHF and UHF bands separate. Mostly menu driven its user interface wasn’t the easiest to navigate. Nonetheless it was and remains desirable. Despite being an all-time best seller, it’s now discontinued as Covid and component supply issues put paid to production.
Yaesu’s until now flagship FTM-300D reviewed in October 2020 (time flies) can decode a single C4FM transmission on either upper or lower displays. The FTM-500D’s all new dual CODEC design can decode 2 x C4FM signals simultaneously.
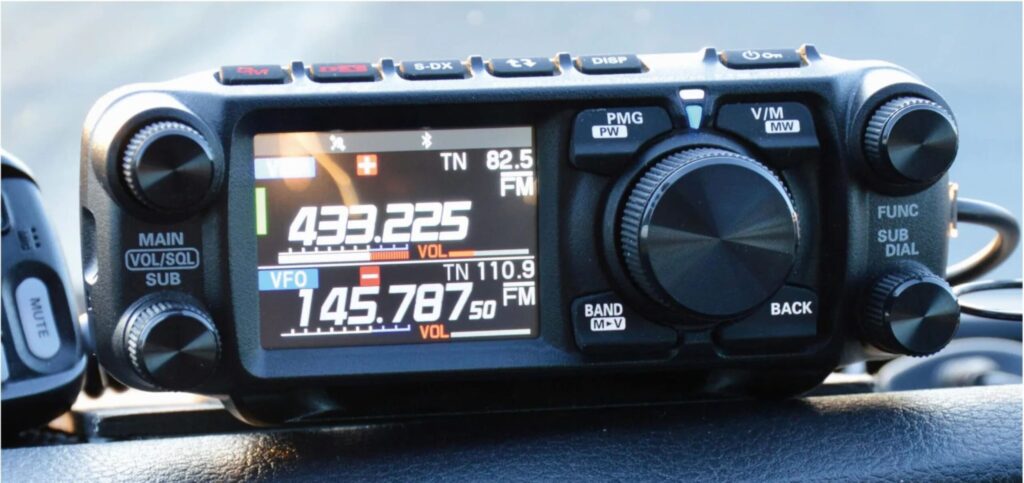
Like the others, the FTM-500D uses Yaesu’s de facto standard Funnel Air-Convection Conductor heatsink (wind tunnel) construction. Upper and lower circuit boards sandwich the one-piece alloy chassis and rear panel.
The entire chassis forms the heatsink for this 50, 25 and 5W selectable output radio, ensuring cooler running for ragchews and increasing worldwide temperatures. Air is drawn through the underside of the radio via multiple grooved channels and extracted by a near silent rear mounted fan.
Familiar but different
At first sight the package looks familiar, same main body with SO239 antenna connector. The same data port plus the really excellent and substantial slide-locking cradle that mounts either above or below the transceiver body that doubles as a desk stand. What immediately strikes you is that the radio is significantly deeper front to back by some 40mm and the front panel taller by some 20mm than its predecessors.
This new radio also comes with an unusual feature. You can angle the head unit upwards by means of two side screws. It’s not a gimmick. Now you can both use it and see the display on a normal height desktop, on a car seat or without having to place it on a higher shelf. I haven’t seen one yet but for extra ease of use, there’s an optional swivel bracket allowing the remotable head unit to be angled towards the operator.
Here I have to point out that in the standard package you don’t get a separate mounting bracket or remote cable for the control head. These are now optional accessories. Surely an oversight and a significant disappointment for an otherwise high spec package.
Fortunately, I was able to use an 8-way RJ connector cable from my FTM-300D and fabricate a simple bracket and screw arrangement to permit head-up display mounting in my campervan.
Supersound
Yaesu has incorporated it’s Aess enhanced audio system into the design, with speakers in both the head unit and the main body. At last a front-mounted speaker, not to mention a microphone that connects to the display and not to the main body when remote. Finally, someone has been listening – see previous moans.
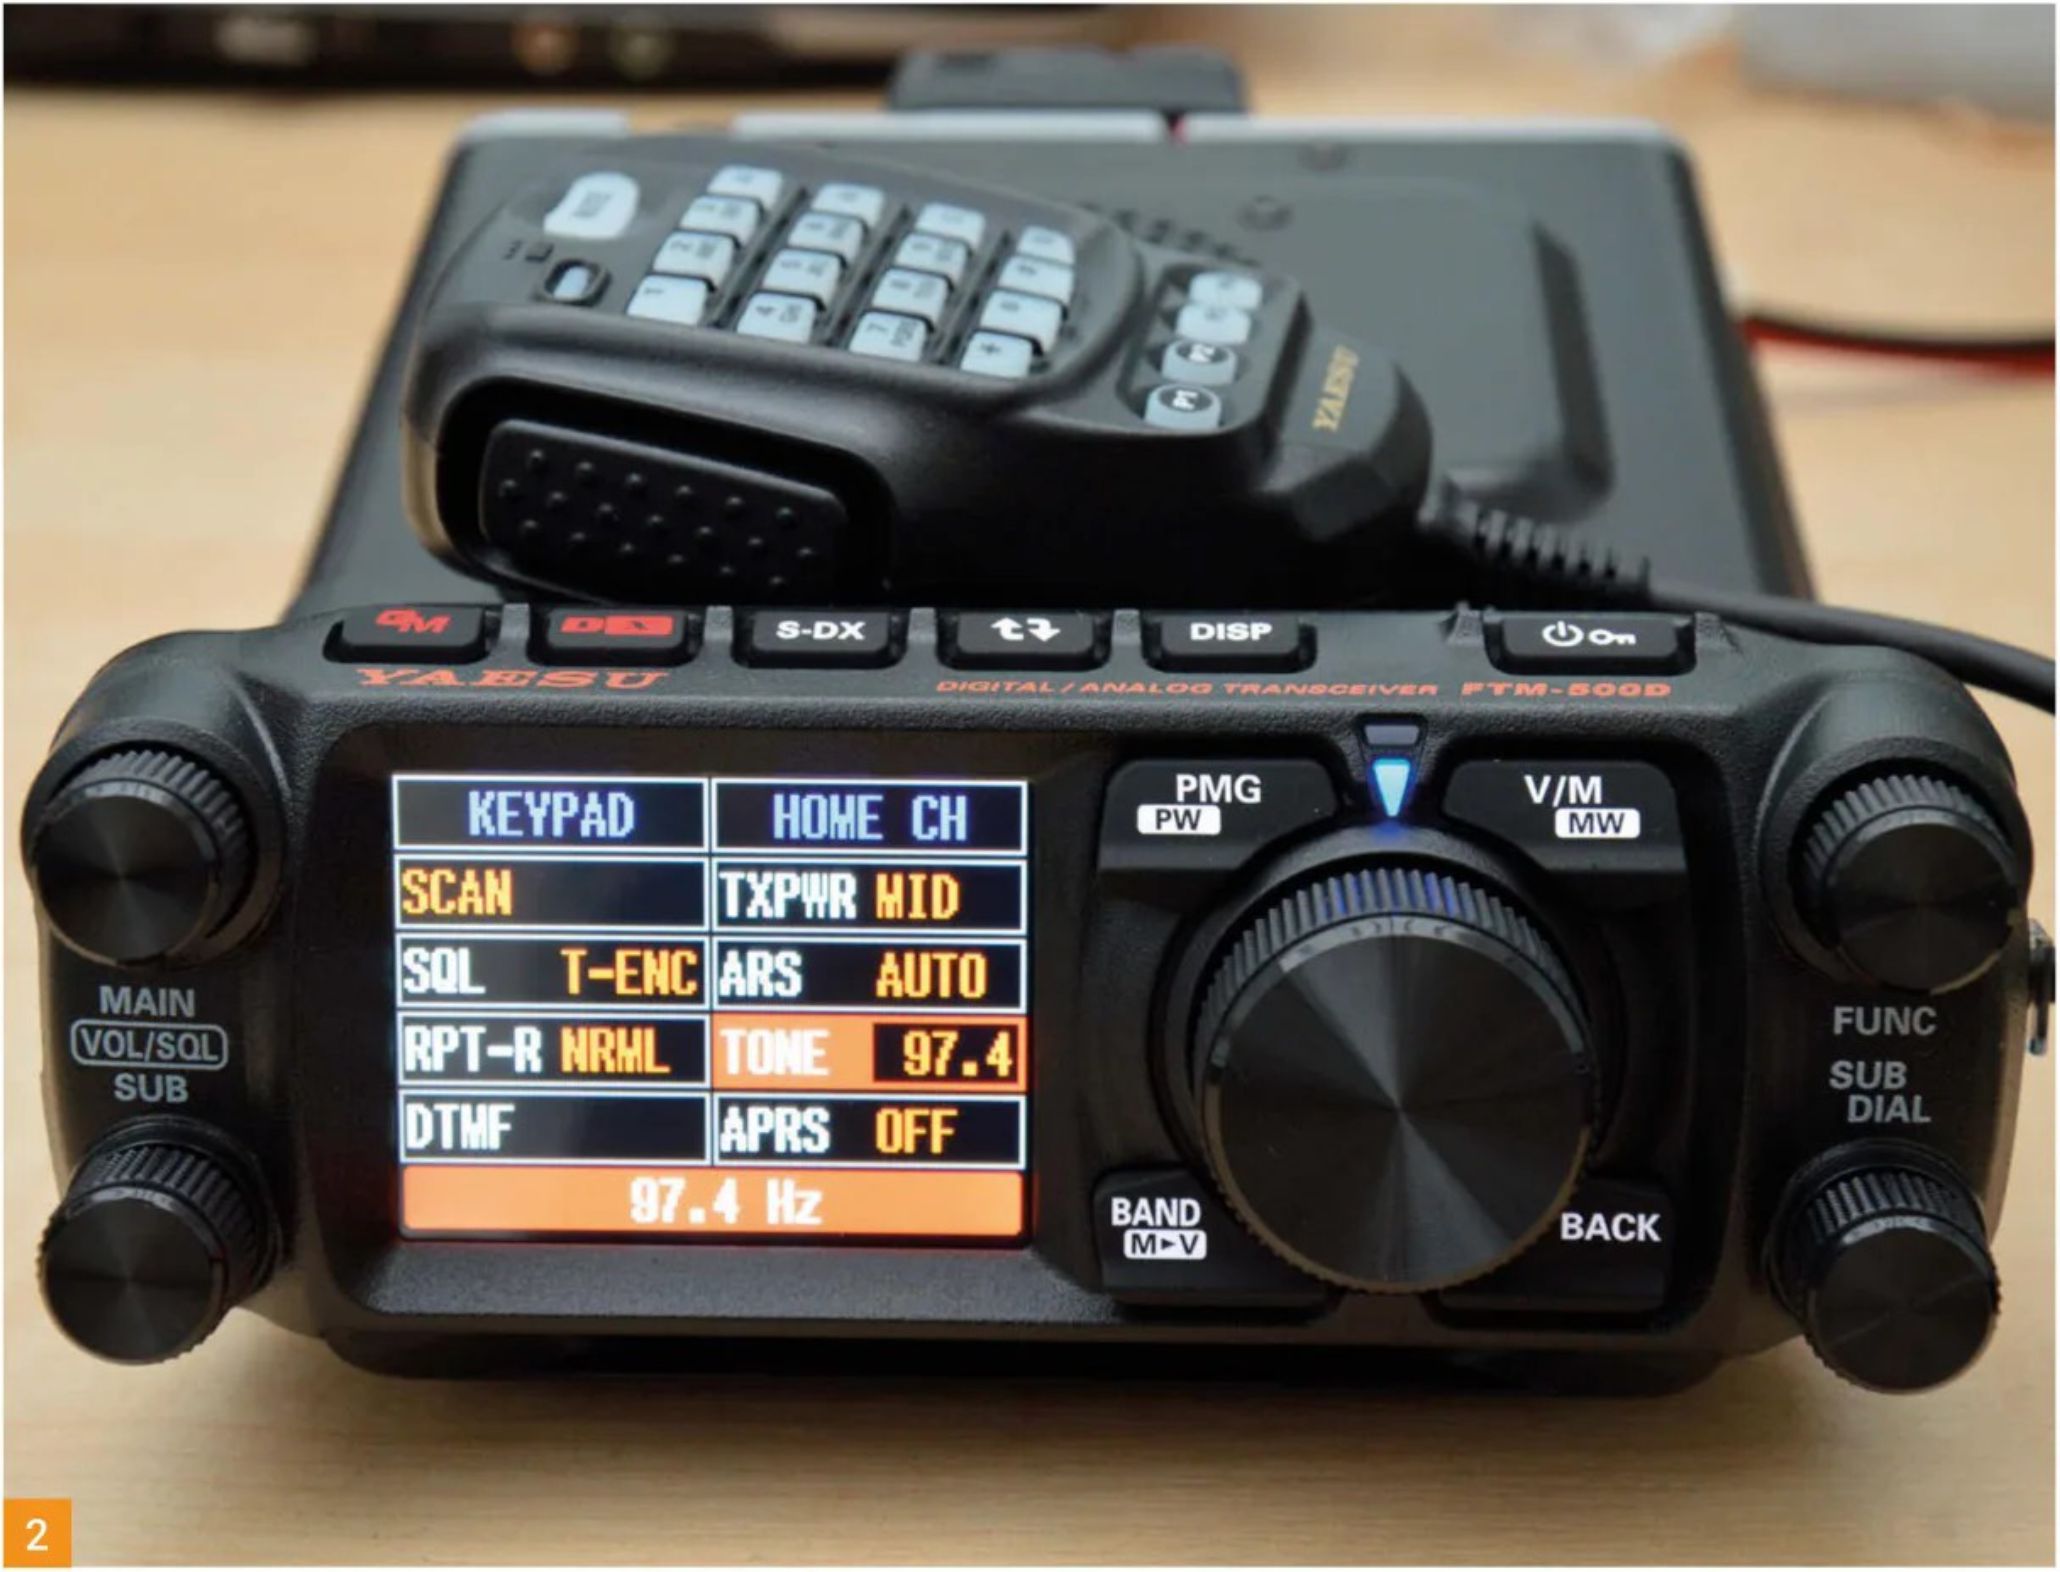
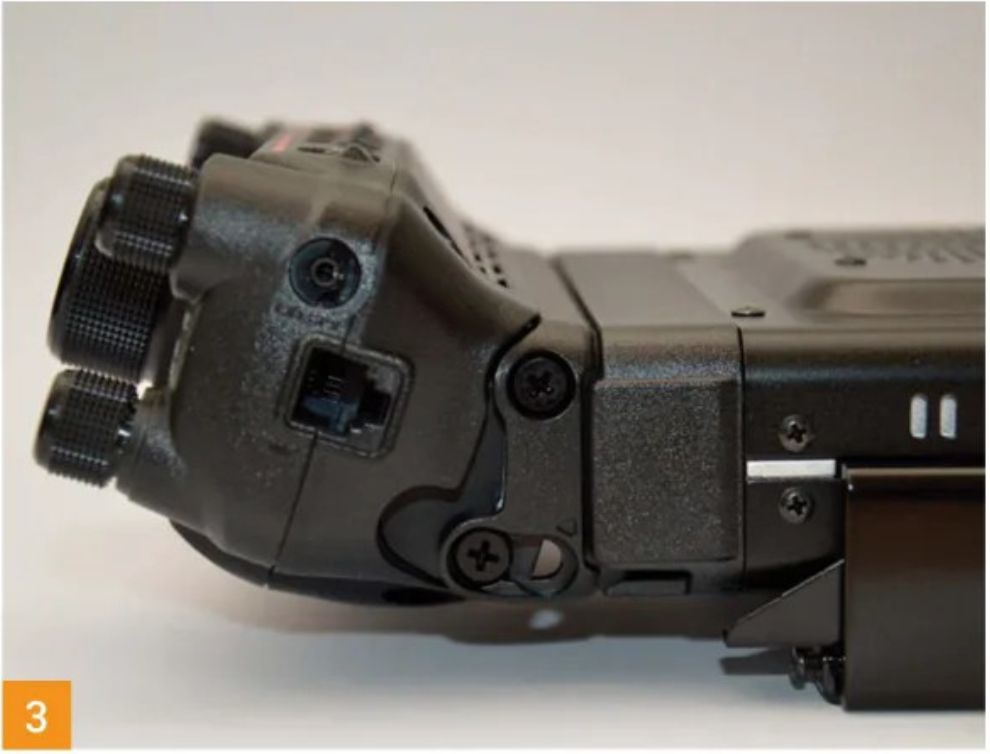
There are two horizontal slots beneath the front of the control head that resemble air intake scoops on cars. Unlike cars these have been created to push sound forward, not suck air in.
The Aess system is capable of varying the phase, output balance and frequency characteristics of the received audio. It definitely produces even higher quality audio than previous radios. I smiled when I read in the handbook that it “reduces fatigue for sustained communication”.
Press and hold the Vol/Squelch knob auto-se-lects menu 18 allowing both front and main body speakers to be adjusted separately for flat/high/ low pitch response. An audio bandpass filter is incorporated plus the Aess phase time delay that’s adjustable between 1.25ms-200ms. The user can now to set up the radio’s audio for best results and personal taste.
I first encountered Aess when reviewing Yaesu’s FT-710 HF transceiver. At the time I wrote that you didn’t miss it until you disconnected the extra speaker and the same applies here. You can turn it off but I wouldn’t advise it, it’s really great.
With up to 6 watts of audio available at the front and a further 3 watts from the rear, the system is so clear and potentially so loud you’d hear it in a tank. Michael Caine and ‘blowing doors off’ springs to mind. It’s the best audio in C4FM mode that I’ve ever heard. As part of the design the radio also has two 3.5mm external speaker sockets on the rear of the main body.
House style
While previous VHF/UHF models had a unique interface layout, owners of Yaesu HF radios will be more than familiar with the house style of a large VFO control surrounded by a cluster of buttons, plus very useful colour coded display and LEDs.
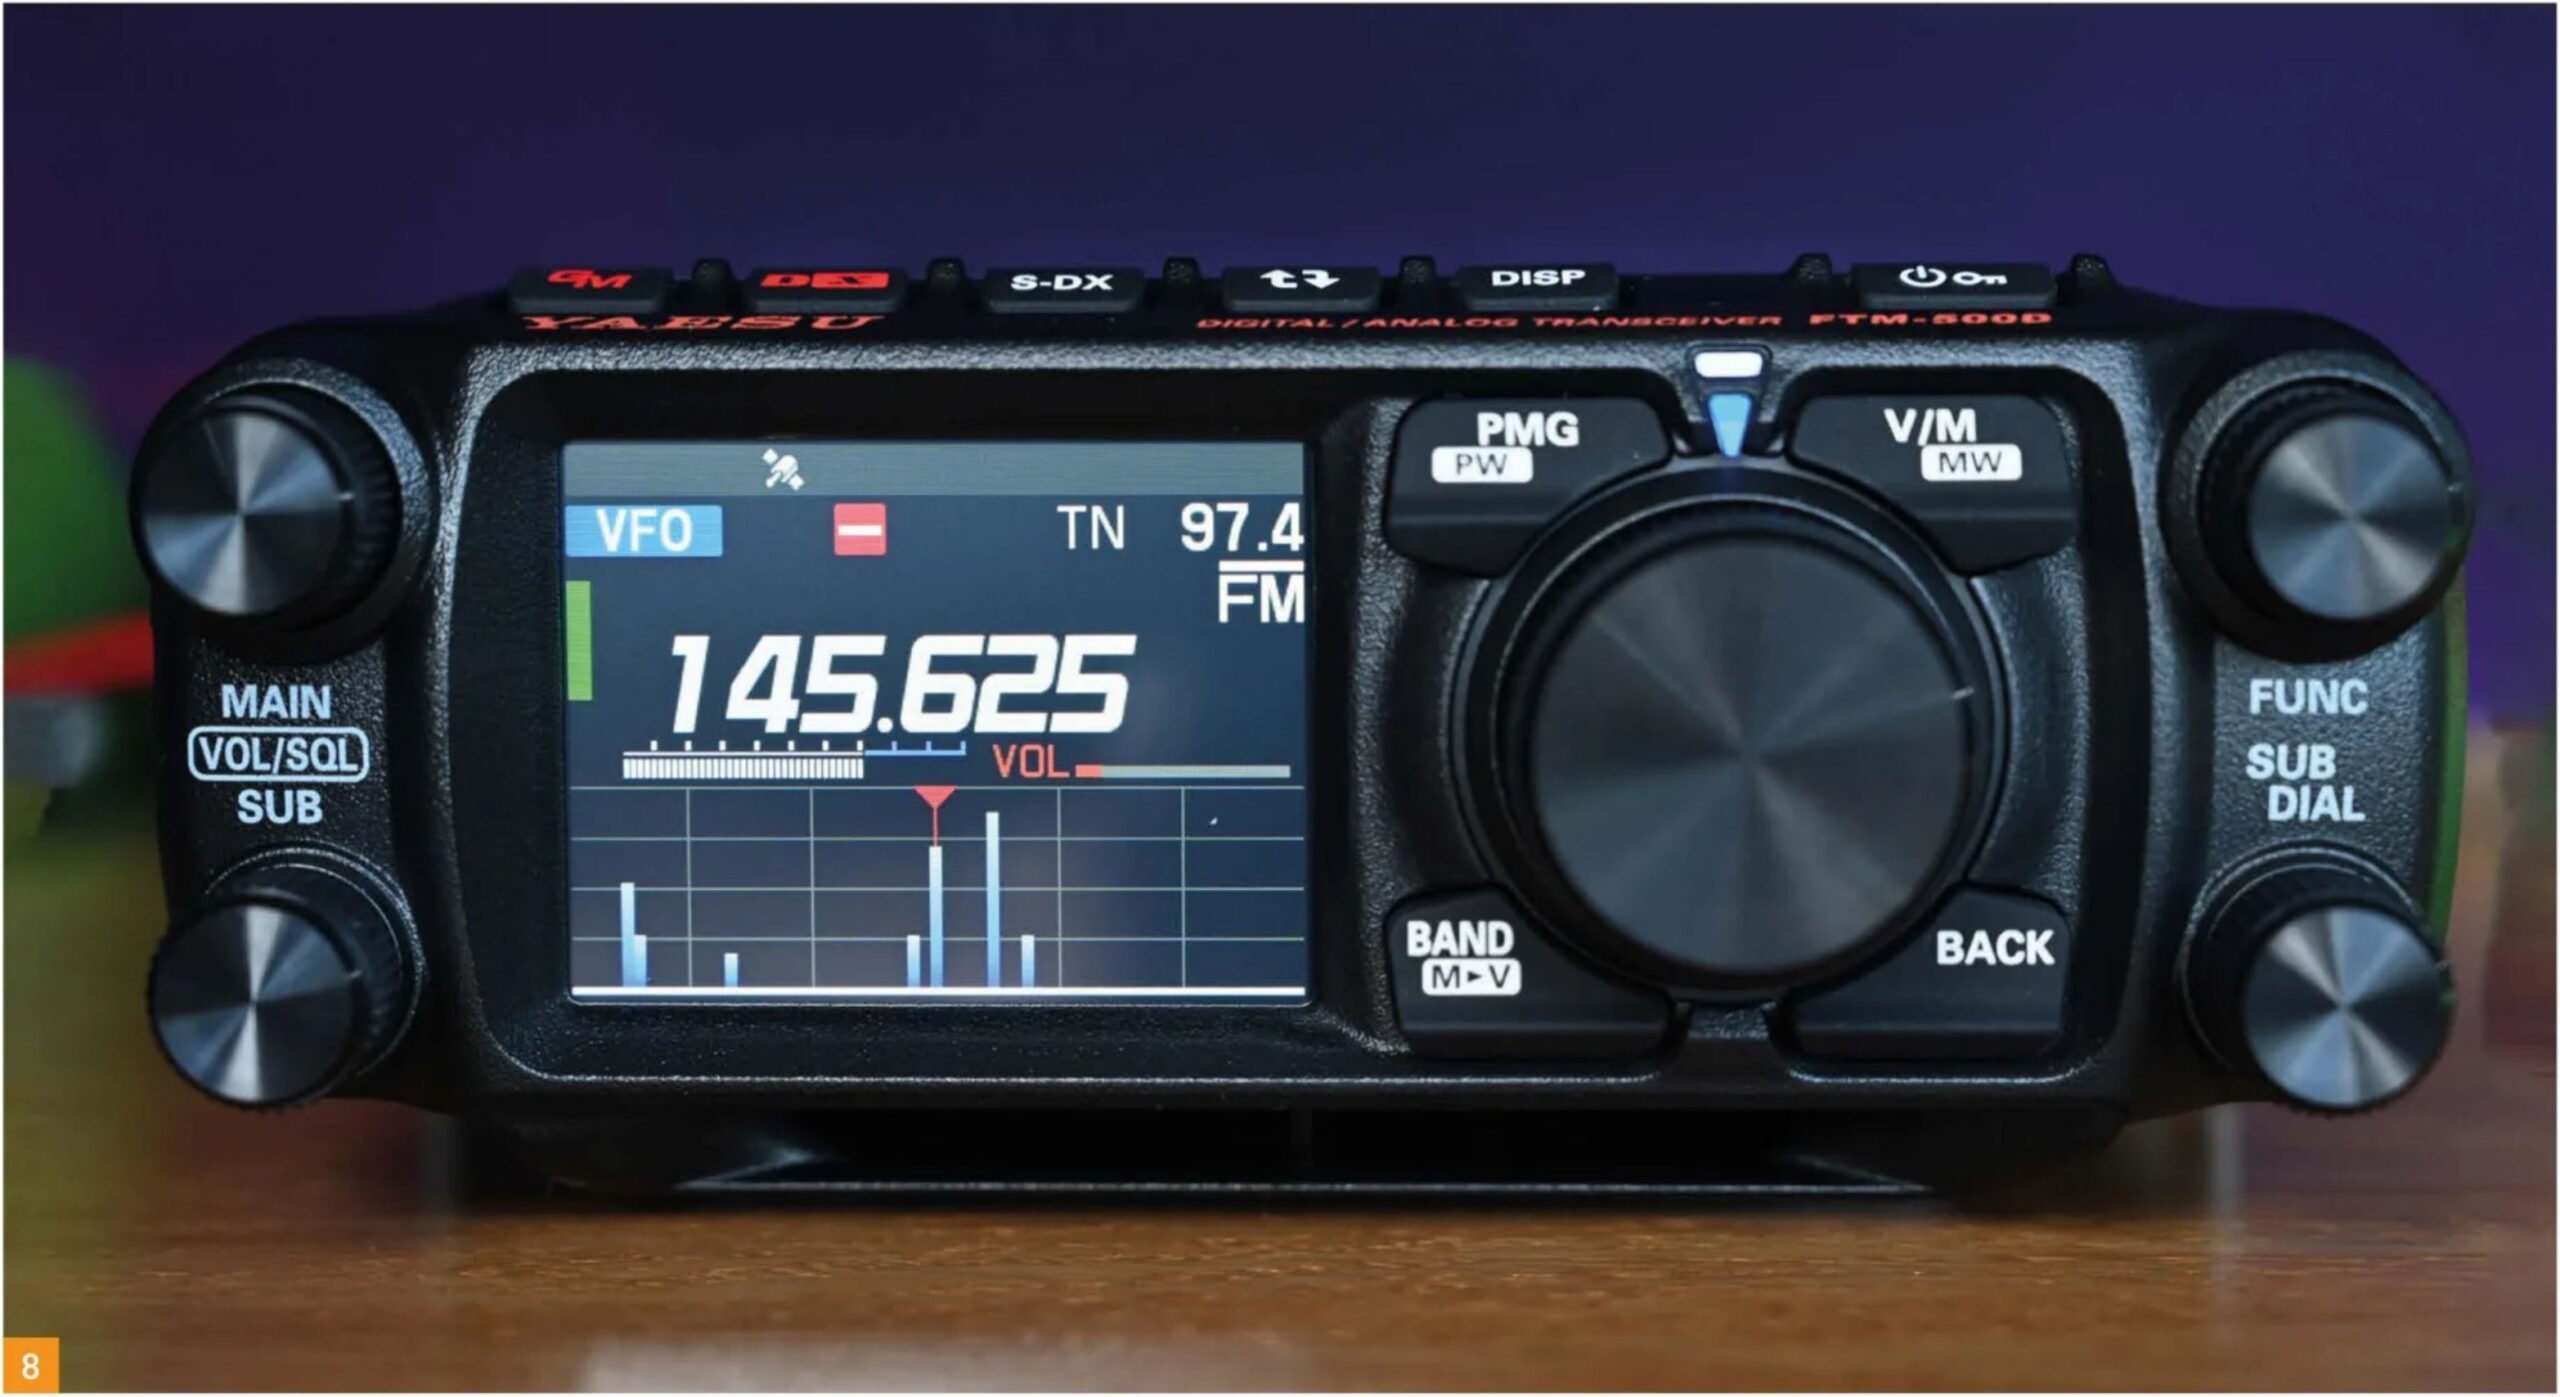
It has a larger and excellent resolution 2.5in colour screen. However, this time the touch sensitive operation differs. The big change is a Main and Sub-Band approach rather than a touch or press to activate upper or lower frequency. Whatever is showing on the top display is now the active transmit band, controlled by the main dial. The lower sub-band is less prominently illuminated and operates in receive/monitor mode only. The sub-band frequency can still be changed by rotating the smaller control, bottom right.
The dual-conversion superhet has two front ends with first IF’s at 55MHz and 56MHz. Both feed a common second IF at 450kHz allowing for simultaneous reception. The FTM-500D has an easy-to-access up/down button on the top edge of the control head to rotate the sub to active and vice versa.
Many buttons make light work
Completely new is the provision of six buttons along the top edge, easier and quicker to use than the smaller cramped buttons of the FTM-300 A big improvement and a real benefit when mobile. From left to right they are:
GM. closed Group monitor
The GM button can assign/select up to 99 individual two-digit Digital Group identity numbers for individuals or groups. One-to-one or group calls can be ideal for family, club or Raynet group activity, using C4FM. GM function is going to become increasingly important as System Fusion moves forward. I hope to tell you more soon so… Watch this space!
DX. mode
Sequentially pressing this button changes the communication mode manually between C4FM, conventional FM or, Automatic Mode Selection. The AMS setting permits the radio to auto-select the same mode as that of the incoming station. When monitoring Air traffic, the radio becomes AM only. Dual action, it also connects the C4FM radio to ‘Wires-X’ via a local internet-connected repeater or node station. Incidentally, the number of access points is fast approaching 300 in the UK alone, with more coming on-line all the time. Connected worldwide links/rooms appear on-screen. Pressing the microphone PTT announces your pre-programmed callsign on-screen to others. Call, listen or join an existing conversation… It’s always QSO time somewhere in the world.
S-DX: super DX
Increases sensitivity for weak signals just breaking the squelch threshold or can achieve fully quieting for those with a little background noise. The Rx best sensitivity measures 0.2 muyV for 12dB SINAD on both 2m and 70cm and is more than adequate. Signals appear to jump up around 4-5dB if the display is to be believed. Useful at the edges of repeater coverage the signal increases but so too does the noise level. I haven’t quite made my mind up as to its usefulness. Above the main dial there’s a small white LED that illuminates to remind you when S-DX is in operation.
Up/Down key
As mentioned earlier this simple, one-touch quick button swaps around the main and sub channels, not the touchscreen as before (I kept poking the screen until I remembered).
DISP display
I love this button! Press and the sub-channel is replaced by the fixed centre band scope with a choice of either 61 or 31 channels displayed. In memory mode, 21 or 11 search channels. Although with comprehensive scanning facilities, a quick look at the screen shows you exactly where any active
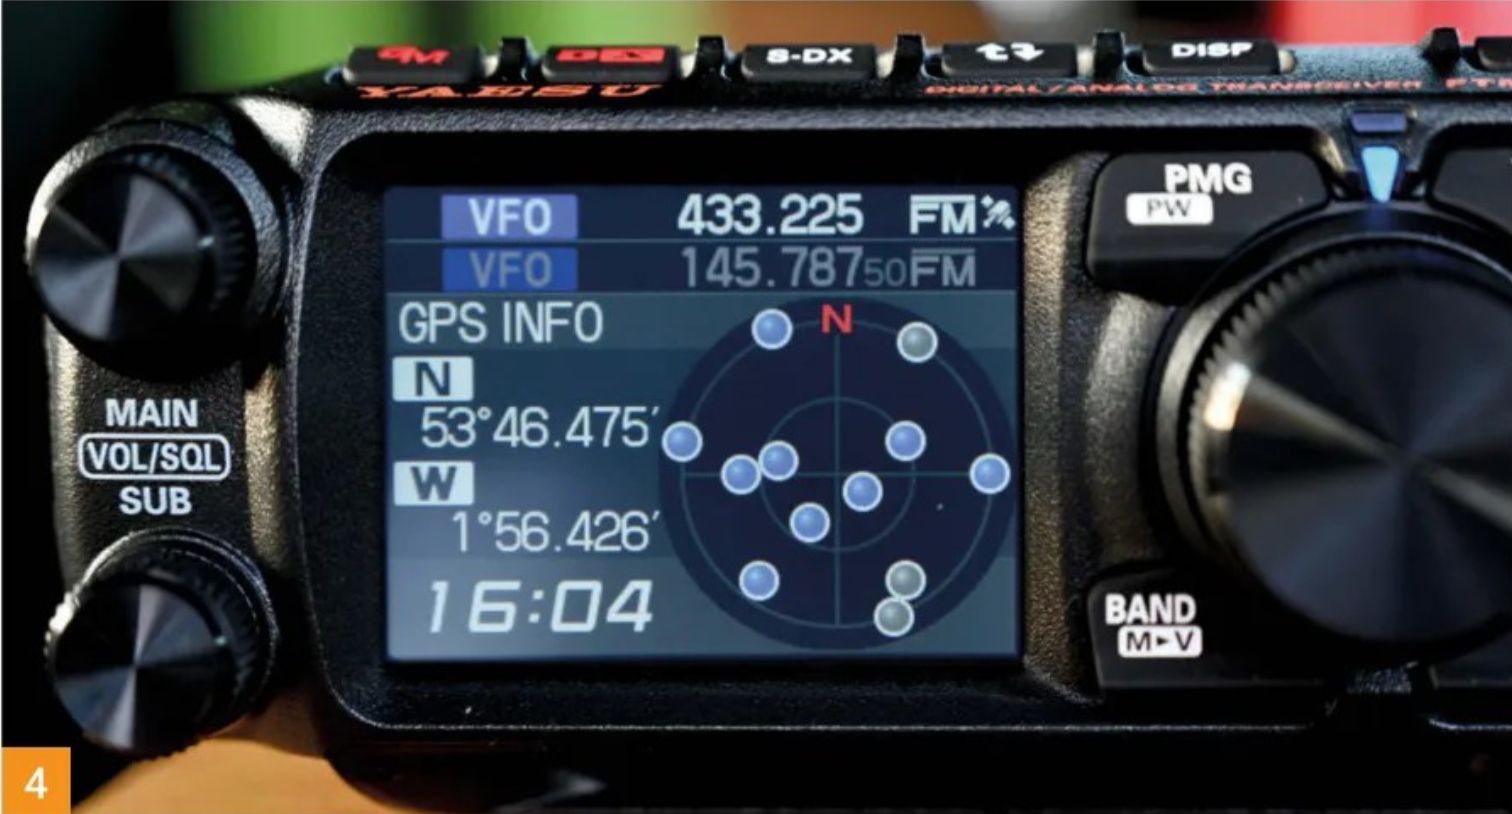
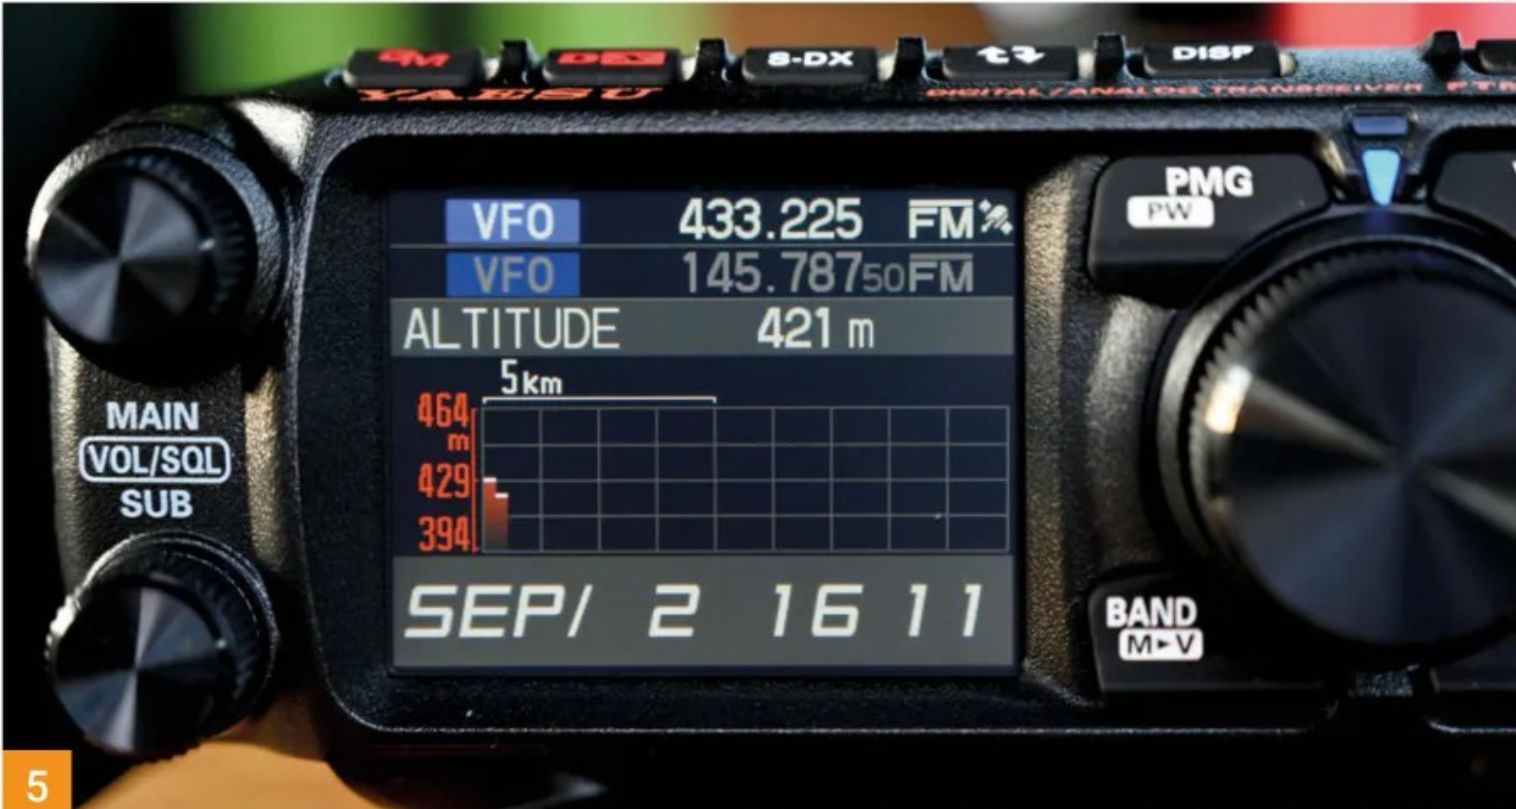
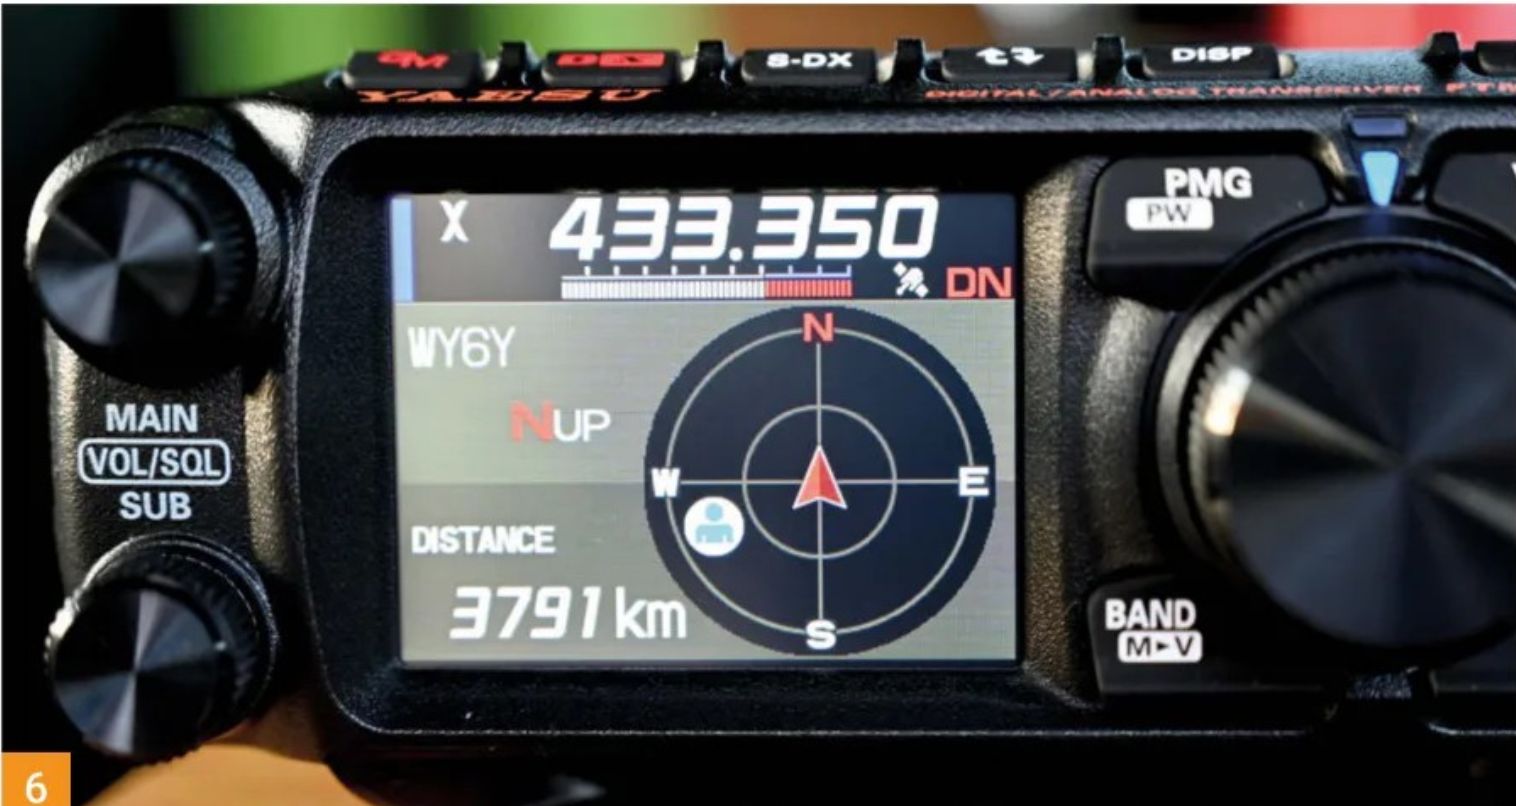
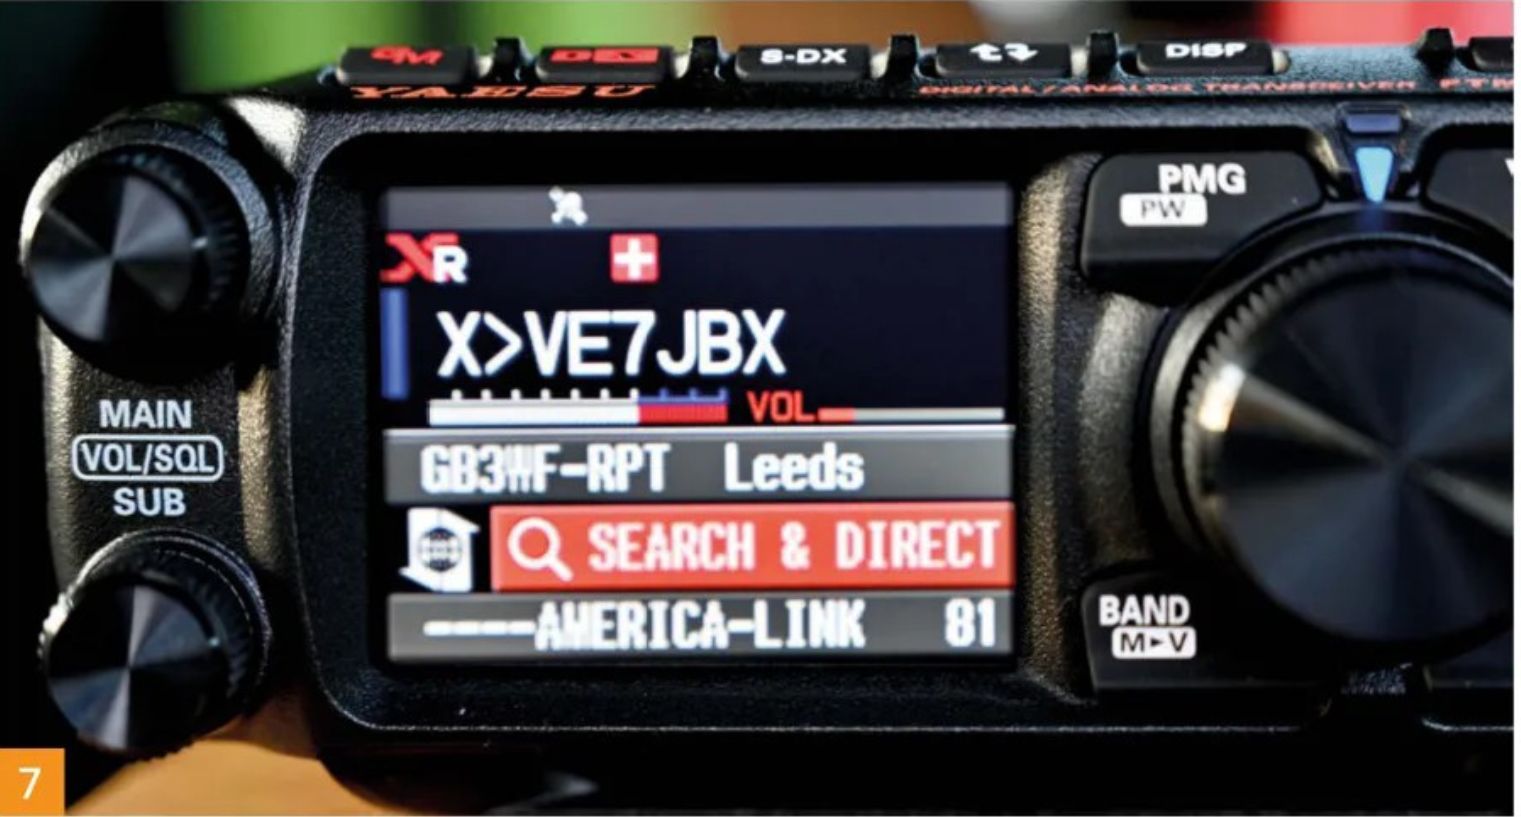
channels are plus their relative signal strength. Next use what Yaesu calls Touch-and-Go. Simply press the wanted signal bar on screen and the wanted channel bursts into life. It’s particularly useful for Air and Marine monitoring where voice calls are short. Visually and practically much quicker than just scanning the band or memory banks. Using AMS you can jump directly to the frequency and mode. It’s particularly useful mobile to quickly identify unfamiliar repeaters or simplex QSOs when standing by at home (see also PMG).
On/Off/Lock
Lastly, it’s nice to see a separate clearly visible on/off/dial lock button. On some radios I’ve often found myself forgetting, pushing the wrong rotary knob and finding everything’s changed.
There’s more… much more.
The four buttons that flank the main dial and similar the HF range are equally useful. Clockwise, the PMG or Priority Memory Group button and now a standard Yaesu feature is for me the ace-in-the-hole. Press and the active channel is stored in one of five quick memories. Road tripping, I was able to one-press store active repeaters on the outgoing journey for easy retrieval on the return. Later, I moved some to more permanent storage for my next trip as, once five locations are filled, the memories overwrite. In PMG mode the screen display changes to amber.
I could write a book on the memory choices and multiple scanning modes. Let’s just say memories and scanning can be a ‘voyage of discovery’.
The headline here is MAG that is, Memory Auto Grouping. If you’ve never owned a Yaesu, this is excellent. Pushing the Band/M-V button bottom left, cycles through five major banks that contain previously stored frequencies by press and hold. Channels are retrieved sequentially according to their frequency range, i.e.: All Memories I Air band (AM) / 144MHz / 430MHz I Other, i.e. 174MHz-400MHz &480MHz-999.95MHz.
Sounds complex but it’s really simple. A display legend changes colour with each band reminding you which bank you’re in.
Bottom right is the Back button – A real favourite in the early stages of getting to know this radio. Pressing it returns you to the previous screen without messing anything up.
The bottom left Band button quickly accesses all five operating bands. Bands can be temporarily locked out using the VFO Band Skip Function in menu 24.
If only 2m & 70cm floats your boat with the occasional Air-band earwig, setting this up makes for a quicker transition from one band to another. You can ignore 220MHz and 850MHz for a start.
I have to mention the Function control, top right as this gives access to the main Menu option used for set up/changes of the radio’s configuration.
Don’t be alarmed when I tell you there are 127 main menu choices Gone is the ’tile’ screen display. Cycling through the function you wanted was easily missed. It’s replaced by a traditional scroll list with complete words.
Menu items are split into manageable chunks with headings according to what they control. Dip in and out, scroll up and down, set and forget, change what you need as and when. If you get lost in the menus, simply press the really useful Back button or admit defeat and read the handbook.
Thoughtfully, Yaesu has provided a short cut readout of the screen/mode settings on the main display. Press CFL and the Customised Function List appears showing eight of the current programmed settings. Typically, you’ll see Repeater Shift info/CTCSS Tone/ Squelch, level/ Power level etc. What’s shown can be customised or changed directly and without resorting to the main menu, e.g. switch the power level or quickly change the CTCSS tone. On this screen I decided to change the default ‘Scan’ setting to that of menu item 7. It then gave me quicker access to the choice of GPS displays, notably Compass, Altitude, Satellites and Backtrack (see later).
Of course, memories can be tagged with names and not forgetting that the radio comes with an excellent glow-in-the-dark programable/customisable and comprehensive hand microphone with DTMF tone keyboard for such as the Echolink system.
Bluetooth&VOX
I was an early convert to Bluetooth use with radio, long before the manufacturers caught on. It just seemed to make sense to me; no trip-up wires in the shack, headset dragging you back when you step out of your car, no one hand on the PTT while driving. You can listen to the locals in one ear on journeys with the speaker automatically muted while your passenger enjoys their music or simply chews your other ear off.
A range of Bluetooth headsets will pair with FTM-500D. I thoroughly recommend the Yaesu/Vertex SSM-BT-10. It’s USB-C chargeable, has integral PTT or VOX plus great sound quality. Forgetful me has one at home plus another in the car.
P.S. I have it on good authority, although not tried it yet, that the on-board Bluetooth allows mobile users to link directly to Bluetooth-enabled car audio systems.
SD card and voice recorder
A 32GB max memory card can be installed on the left-hand side of the head unit. This enables back-up of the radio’s data and information, memories, group messages, Wires-X and GPS log data. It also provides voice recording in .wav format with date and time logging. I can think of many uses and possibilities – perhaps Raynet, Air & Marine monitoring, emergencies etc. What about recording DX contacts or abuse and illegal activity on any frequency? It should be noted that you can’t simply clone your older software into this new transceiver. It’s worth starting again to take advantage of the latest up-grades.
Clever stuff
The radio has an interesting facility for calling a friend or group with similar radios in FM-only mode. A two-tone CTCSS personal code can be set. When activated the receiving station or group can be alerted by a bell sound and a ‘called’ legend is left on the screen if not answered.
The transceiver is equipped with a fully functioning GPS receiver In C4FM mode displaying the compass either heading-up or North-up display for real time navigation and current position becomes available.
This is only the tip of the iceberg in terms of possibilities. Start point and way-point entries allow the back-track system to operate for logging and return.
It’s fascinating when operating with a similarly equipped C4FM station in V/D, Voice Data mode and Wires-X to see readout of bearing distance between stations or the number of satellites in view, Latitude/Longitude, Altitude, Timer/Clock and there’s even a countdown timer. I’m not sure how much use the lap timer might get. I can see some of these facilities being used in conjunction with other mobiles and handhelds by Raynet or search and rescue, etc.
APRS
Which leads me on to APRS as GPS is an integral part of the Automatic Packet Reporting system. I would love to delve further into what the FTM-500D can do in this department. I’m aware that APRS isn’t everyone’s cup of tea and space doesn’t permit. What I can say is that studying what it can do and how it’s displayed on the FTM-500D has been a real eye opener.
There’s much more to APRS than simply tracking a suitably equipped mobile. Yaesu’s website has five freely downloadable separate manuals for the FTM-500D. The APRS manual is second only to the complete advanced manual at 55 pages and best digested slowly. It’s a packet type data system providing not only enhanced information and tracking to the GPS screen but also a 67-character messaging facility. Using a beaconing network of fixed and mobile stations, including the FT-500D itself, data can be transferred and displayed on mobile screens or via computers using the 10-pin data jack and an optional interface cable. APRS is definitely addictive.
Dilemma
I’m in something of a bind here, having already given a maximum 5 stars to its predecessor. There’s no sixth star so I’ll have to be content with at least the same score.
My impression is that someone at Yaesu has sat down with a blank sheet paper (screen) and considered what’s good, what’s not so good and what ‘s required in a new model. Maybe they’ve listened to feedback; maybe a PW review? I can dream. The FTM-500D is a clear re-think from an operational/ usability standpoint. This radio is different and a pleasure to use.
It shines when used mobile, especially where the control head is in the eye line and easy to reach. If I’m being picky, I would have liked to have seen access to the GPS readout assigned to a single switch and rotary control. It may be there and I just haven’t found it yet – there’s so much to explore.
P.S. Not in the handbook, it has the ability to cross-band repeat.
As a desktop fixed station, it’s attractive especially with its angled display. Being a seriously premium product it’s perhaps reasonable to have expected a remote cable and head stand as part of the package. At the factory gate the additional cost would likely be minimal but the buyer’s satisfaction even better.
My final thoughts – the FTM-500D isn’t just a dual-band radio, it’s much more than that. It’s a gateway into the fast developing and maturing world of System Fusion.
The crunch question has to be, would I buy it? Based on what I’ve learned and what I know is coming with System Fusion, I’ve already raided the piggy bank!


