PowerShell has been around for a long time. It is a command-line shell and scripting language developed by Microsoft for task automation and configuration management. This article will show you how to create the first PowerShell script.
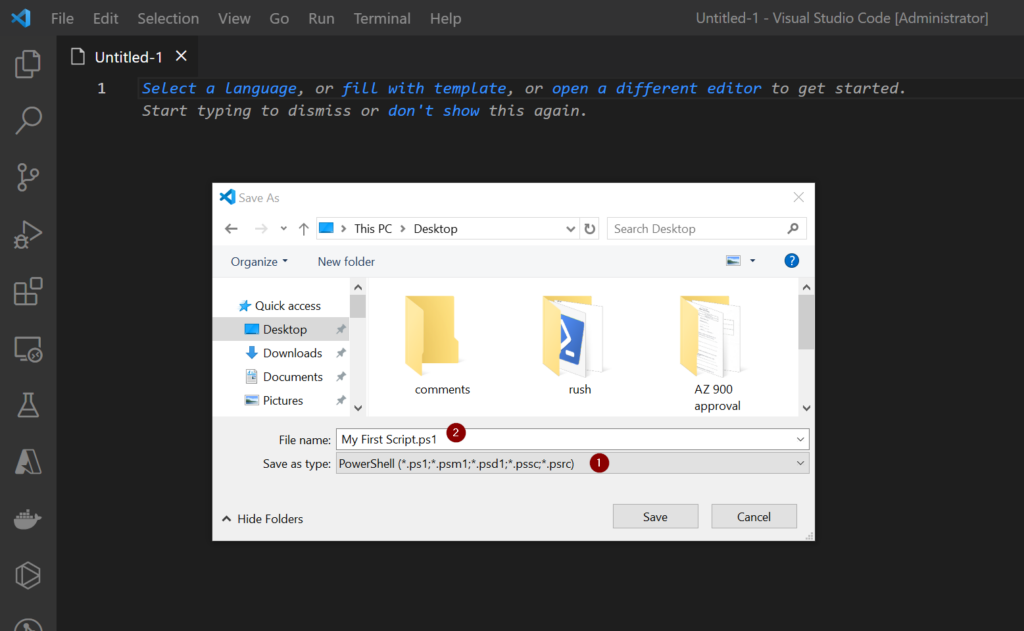
To do this, I will launch Visual Studio Code, the preferred PowerShell script writer. Open it, and click on File> New Text File to create an Untitled file. Click on File> Save As to give that File a specific name. Notice that it tries to save it as plain text. So, I scroll down in the Save as type dropdown and choose PowerShell [1]. And I’m going to call it My First Script [2]. Now, we have a PowerShell script file.
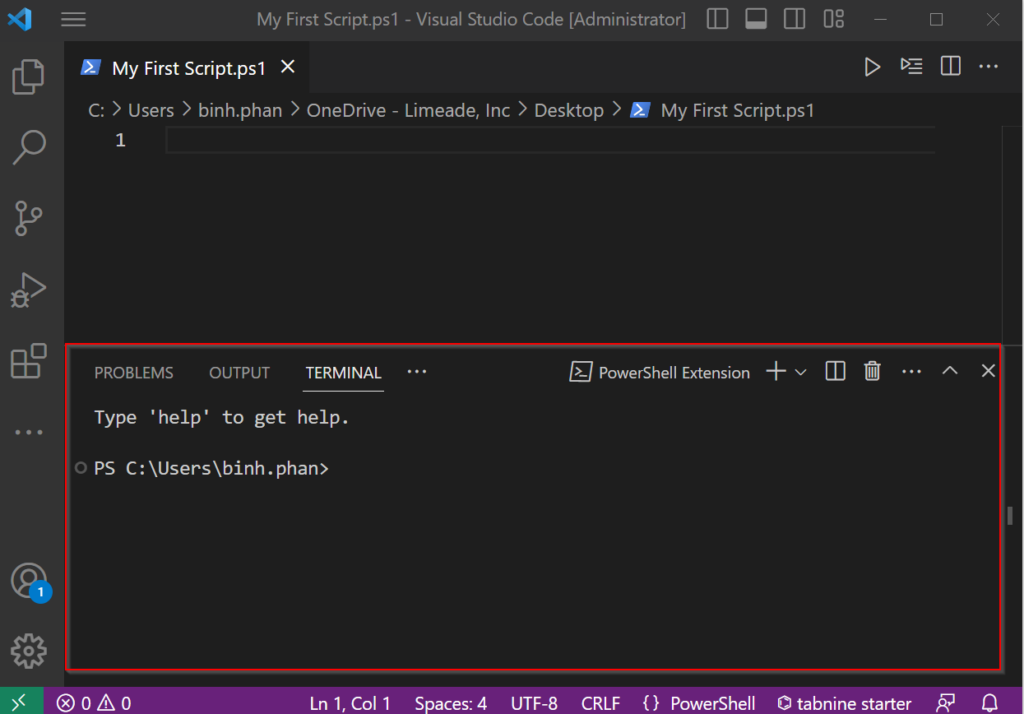
When we looked at the editor, in the bottom section is Terminal. Any commands that I run here can be executed at the bottom.
Let’s try a couple of different approaches. The first one is to create a script that returns a value.
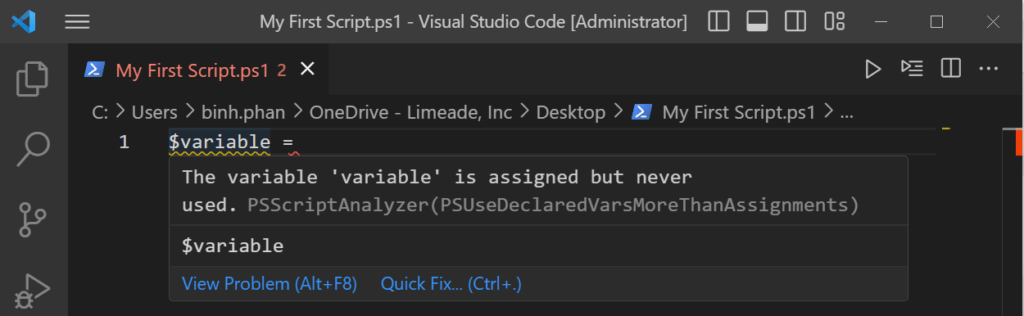
So, I will create a $variable and set that to a specific value. Using Visual Studio Code with PowerShell add-in will give me some warning/error type handling or tell me when things are wrong.

Hover the mouse over the $variable; you can see my variable isn’t being used by anything.
If I hover my mouse over the equal sign, it will say, well, you must complete this.

It can be slightly confusing doing this because it starts to warn everywhere. But once we start typing in commands:
$variable = Get-ServiceYou’ll see the equals error has gone away because we’ve created a variable and populated the right-hand side.
What I’m now going to do is utilize another method called Write-Host. Write-Host is a PowerShell print command. Now, notice what happens here.
Write-Host $variableThe warnings have now been removed because it’s continually checking to ensure that the values are correct, that the variables have values, and that they’re being reused.
If I just created a variable called variable one and never utilized it, it would be useless, but also it would tell us here that there was a specific error. Then, I will filter to a specific type of service or name, Get-Service. I could use a name and then pass on the value. So that’s why we go with our DNS cache again.
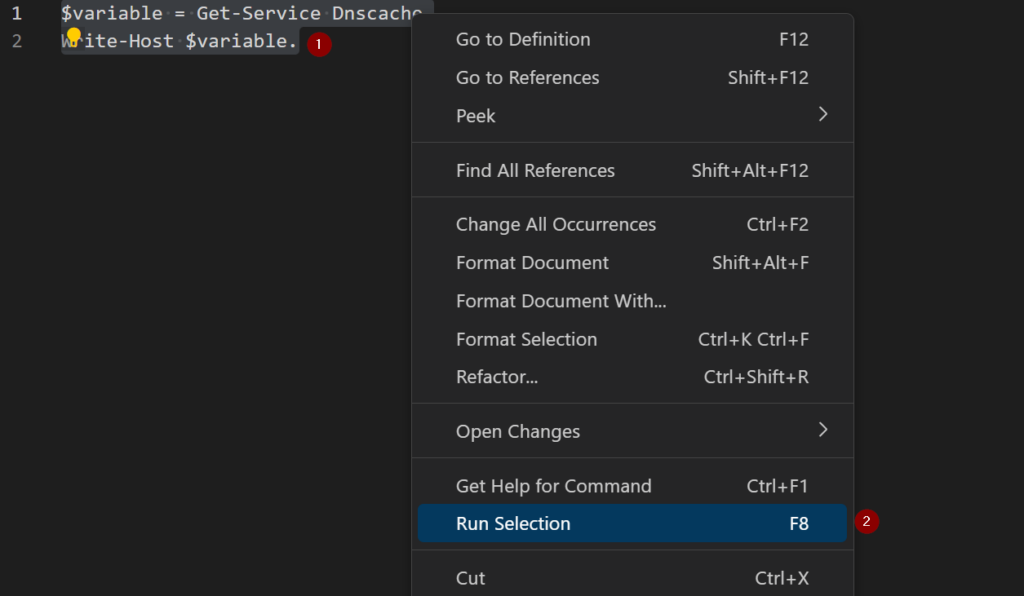
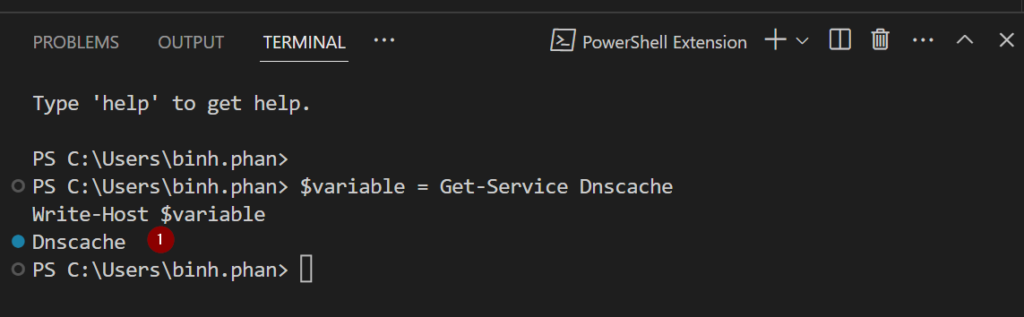
$variable = Get-Service Dnscache
Write-Host $variable
How do I run a Powershell script in Visual Code?
First, select all the code [1], and we can right-click here and say Run Selection. Or I could say F8 [2] on the keyboard, and it would execute. Sure enough, it gives me a value when I run it, so I know it’s working correctly.
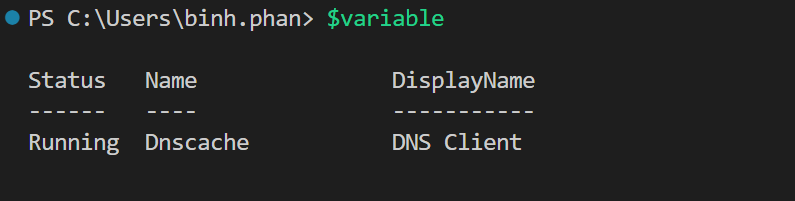
If I just cleared this bottom section and type $variable and Enter, you’ll see I can check the existence of the values.
My Write-Host option allows me to output values to the screen. Remember that when a PowerShell object is returned, we get access to the specific properties. So you’ll see, what’s nice here is I get the IntelliSense for those options.
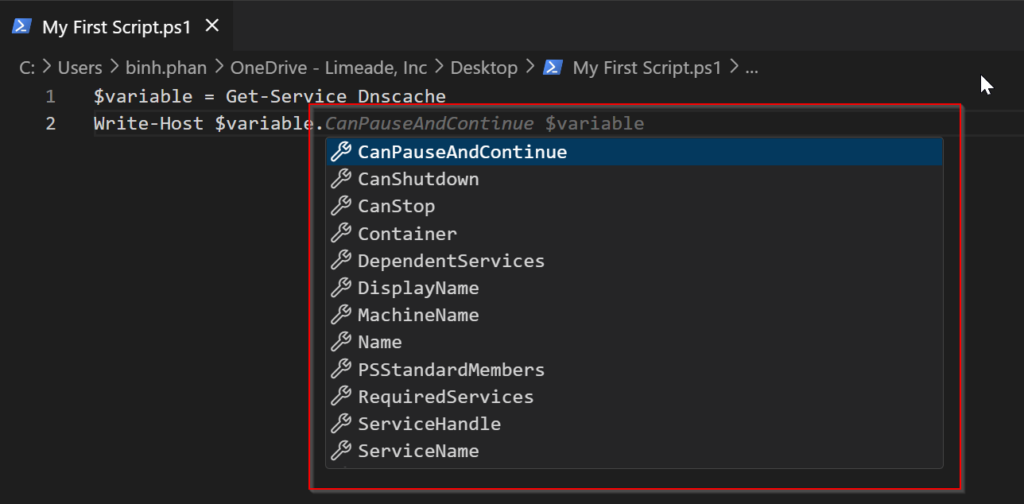
Of course, what’s confusing here is that I don’t know which ones, so what’s nice about the Write-Host is that we have some foreground colors that we can utilize.
So let’s select the whole thing and ensure it works, F8. And sure enough, yellow, green, and blue. So fantastic, there’s our PowerShell script.
How do we execute the Powershell script file itself?
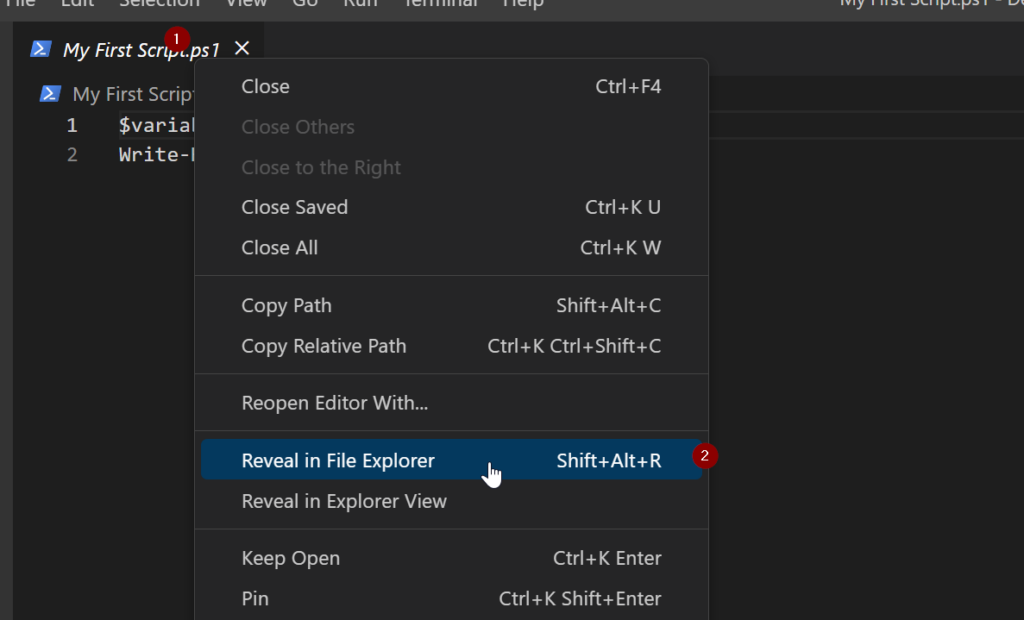
Right-click here on the script file I created [1] and choose Reveal in File Explorer [2]. This will give me the path that I’m looking for. Now, what we want to be able to do is run this in the Windows Terminal. Open Windows Terminal. And you see that my path here is C:\Users\binh.phan\OneDrive – Limeade, Inc\Desktop.
We can use standard syntaxes, like pushD and push directory, to get to that. Or we could also use Set-Location and then the path. And that will set the location.
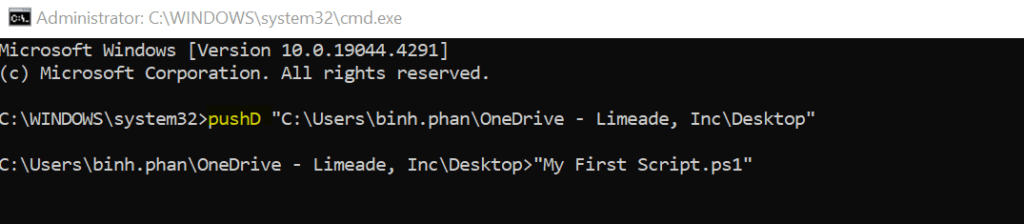
So, how do we execute the My First Script?
We can simply type my, press Tab, and because we’re in PowerShell, it automatically understands that a PS1 is an executable file, allowing me to run that within my PowerShell.
How do I fix “Running PowerShell scripts is disabled”?
“Running PowerShell scripts is disabled” is a common issue users encounter when executing scripts in PowerShell. This problem often arises due to the default security settings in PowerShell, designed to prevent malicious scripts from running inadvertently.
To enable the execution of PowerShell scripts, you can follow these steps:
- Open PowerShell as Administrator: Right-click the PowerShell icon and select “Run as Administrator” to open an elevated PowerShell session.
- Check Execution Policy: Use the command
Get-ExecutionPolicyto check the current execution policy. If it returns “Restricted,” script execution is disabled. - Change Execution Policy: To enable script execution, use the command
Set-ExecutionPolicyfollowed by the desired policy, such asSet-ExecutionPolicy RemoteSigned. This policy allows local scripts to run without a digital signature but requires downloaded scripts to be signed by a trusted publisher. - Confirm Policy Change: After setting the execution policy, confirm the change by typing “Y” and pressing Enter.
- Run Scripts: Now that script execution is enabled, users can run PowerShell scripts by navigating to the script location and typing
.\scriptname.ps1, replacing “scriptname” with the actual name of the script.
By following these steps, users can overcome the “Running PowerShell scripts is disabled” issue and execute PowerShell scripts with ease. However, exercising caution when running scripts from untrusted sources is important to avoid potential security risks.
Congratulations! You’ve taken your first steps into the world of PowerShell scripting. While this guide covers the basics, there’s still much more to learn and explore.